
Ultrasonic distance measurement (ESP32)
An ultrasonic sensor measures the distance to an object using high-frequency sound waves (ultrasound). The sensor emits a short ultrasonic pulse and then measures the time it takes for the reflected signal to come back. From that time and the known speed of sound, the distance to the object can be calculated.
Such sensors are used in robotics, obstacle-avoidance systems, automatic doors, parking sensors and many IoT projects. In this exercise we use the popular HC-SR04 ultrasonic sensor connected to an ESP32 development board.

Practical setup
ESP32 connected to the HC-SR04 sensor while measuring the distance to an object.

Wiring diagram
Overview of all connections between the ESP32 board and the ultrasonic sensor.

Sensor pins
Detailed view of the VCC, Trig, Echo and GND pins.
How does an ultrasonic sensor work?
It works by sending and receiving ultrasonic waves. The sensor emits a pulse toward the object and then detects the reflected signal that comes back. By measuring the time between sending and receiving the pulse, the distance to the object is determined.
The ultrasonic wave travels from the sensor to the object and back. Since the total travel time is measured, the result is divided by two to get the actual distance to the object.
HC-SR04 pins
The HC-SR04 has four basic pins:
- VCC – sensor supply
- Trig – input that starts a measurement
- Echo – output that returns the duration of the reflected signal
- GND – common ground
To keep the wiring simple, in this exercise the VCC pin of the sensor is connected to the 3V3 output of the ESP32 board. Many HC-SR04 modules work at this voltage, but some units may have a shorter range or occasionally unreliable readings. For full precision and the rated range the sensor is powered from 5 V – but then the Echo pin also gives 5 V, so it must be connected to the ESP32 through a voltage divider (e.g. 1 kΩ and 2 kΩ), because ESP32 pins tolerate at most 3.3 V.
Formula for the distance
By measuring the time between sending and receiving the ultrasonic pulse, we calculate the distance with the formula:
Distance = (Time × Speed of Sound) / 2
The speed of sound in air is approximately 340 m/s, or about 0.034 cm/µs.
- Time – the measured return time of the signal
- Speed of Sound – the speed of sound in air
- /2 – because the signal travels to the object and back
Why use the ESP32?
The ESP32 has much more capability than classic microcontroller boards and makes it easy to connect sensors to the internet.
- ✅ Built-in Wi-Fi
- ✅ Built-in Bluetooth
- ✅ More GPIO pins
- ✅ Faster program execution
- ✅ Suitable for IoT projects and automation
Materials needed
- ESP32 development board
- HC-SR04 ultrasonic sensor
- Breadboard
- Jumper wires
- USB cable for connecting to the computer
- Arduino IDE with ESP32 support installed
Safety recommendations
- Always connect a common ground (GND) between the sensor and the ESP32 board.
- Check all connections before switching on the power.
- Do not place obstacles too close to the sensor, because the minimum measuring distance is a few centimeters.
- When using several ultrasonic sensors, watch out for interference between them.
ESP32 model used in this exercise
This exercise uses the ESP32 DevKit V1 (DOIT) development board, one of the most common ESP32 models. The exercise can also be done on other ESP32 boards, because the ultrasonic sensor can be connected to almost any digital GPIO pins. The only difference may be the pin layout on the board.

ESP32 DevKit V1
The development board used in this exercise to connect and program the ultrasonic sensor.
In this exercise the Trig pin of the ultrasonic sensor is connected to GPIO 5, and the Echo pin to GPIO 18. Other digital pins can be used too, with the matching change in the program.
Preparing the Arduino IDE
Before programming, the Arduino IDE must be set up for ESP32 boards. If you have done the previous ESP32 exercises, this step is probably already finished. Otherwise, do the following:
- In the File → Preferences menu, find the Additional Boards Manager URLs field and add the address:
https://espressif.github.io/arduino-esp32/package_esp32_index.json - Then open Tools → Board → Boards Manager and install the package ESP32 by Espressif Systems.
- Select the board: ESP32 Dev Module or DOIT ESP32 DevKit V1.
After installing the ESP32 package and selecting the right board, the Arduino IDE is ready for programming, uploading and communicating with the ultrasonic sensor.
Wiring diagram
To connect the HC-SR04 ultrasonic sensor to the ESP32 microcontroller, the power and signal pins must be wired correctly. In this exercise we use a simple connection in which the sensor is powered from the 3.3 V output of the ESP32 board.
The HC-SR04 has four pins:
- VCC – sensor supply
- GND – common ground
- Trig – pin that starts a measurement
- Echo – pin through which the sensor returns the result
The connections between the sensor and the ESP32 board are shown in the diagram at the beginning of the lesson:
- VCC → 3V3
- GND → GND
- Trig → GPIO 5
- Echo → GPIO 18
The HC-SR04 was originally designed for 5 V, but in this exercise it is powered from 3.3 V to make the connection to the ESP32 simpler and safe for its pins. Most sensors work without problems in this configuration, but the maximum range may be somewhat shorter than specified.
After connecting all wires, we can write the program that triggers the ultrasonic pulse, measures the return time and calculates the distance to the object.
How does ultrasonic distance measurement work?
To understand how the ESP32 measures distance with the HC-SR04, we need to know what happens during one measurement. The process is very fast and takes only a few milliseconds, but it can be divided into a few simple steps.
The ESP32 sends a signal to the sensor to start a measurement. The sensor then emits an ultrasonic wave that travels through the air, bounces off the object and returns to the sensor. From the time it takes for the signal to return, the distance to the object can be calculated.
The ultrasonic wave travels from the sensor to the object and back. The farther away the object is, the longer it takes for the reflected signal to return.
1. The ESP32 sends a TRIG pulse
The ESP32 sends a very short pulse lasting 10 microseconds to the TRIG pin:
digitalWrite(trigPin, HIGH);
delayMicroseconds(10);
digitalWrite(trigPin, LOW);
This tells the sensor to start a new measurement.
2. The sensor emits an ultrasonic signal
After receiving the TRIG pulse, the HC-SR04 automatically emits a burst of 40 kHz ultrasonic waves. At the same time it sets the ECHO pin HIGH.
3. The signal travels to the object and back
The ultrasonic wave travels through the air until it hits an obstacle. After reflecting, it returns to the sensor.
While the signal is traveling:
- ECHO = HIGH – measurement in progress
- ECHO = LOW – the signal has returned and the measurement is complete
4. The ESP32 measures the pulse duration
The ESP32 uses the pulseIn() function to measure how long the ECHO pin was HIGH:
long duration = pulseIn(echoPin, HIGH);
The result is the travel time of the ultrasonic wave in microseconds.
Calculating the distance
After measuring the time, the distance is calculated with the formula:
float distance = duration * 0.034 / 2;
The number 0.034 is the speed of sound in centimeters per microsecond, and the result is divided by two because the signal travels to the object and back.
If the ECHO pulse lasts 1000 μs, the ultrasonic wave has traveled about 34 cm. Since the signal went to the object and back, the actual distance to the object is about 17 cm.
Measurement timeline
| Time | Event |
|---|---|
| t₀ | The ESP32 sends the TRIG pulse |
| t₁ | The sensor emits the ultrasonic signal and sets ECHO = HIGH |
| t₂ | The reflected signal returns to the sensor |
| t₃ | ECHO goes LOW and the measurement ends |
| t₃ − t₁ | Pulse duration the ESP32 uses to calculate the distance |
Program for measuring distance
The following program triggers the ultrasonic sensor, measures the return time of the signal and calculates the distance to the object in centimeters.
// Distance measurement with the HC-SR04 sensor and ESP32

const int trigPin = 5;
const int echoPin = 18;

long duration;
float distance;

void setup() {

  pinMode(trigPin, OUTPUT);
  pinMode(echoPin, INPUT);

  Serial.begin(115200);
}

void loop() {

  digitalWrite(trigPin, LOW);
  delayMicroseconds(2);

  digitalWrite(trigPin, HIGH);
  delayMicroseconds(10);
  digitalWrite(trigPin, LOW);

  duration = pulseIn(echoPin, HIGH);

  distance = duration * 0.034 / 2;

  Serial.print("Distance: ");
  Serial.print(distance, 2);
  Serial.println(" cm");

  delay(500);
}
Program explanation
- pinMode(trigPin, OUTPUT) – sets the TRIG pin as an output.
- pinMode(echoPin, INPUT) – sets the ECHO pin as an input.
- pulseIn() – measures the duration of the HIGH pulse on the ECHO pin.
- distance = duration * 0.034 / 2 – calculates the distance in centimeters.
- Serial.print() – shows the result in the Serial Monitor window.
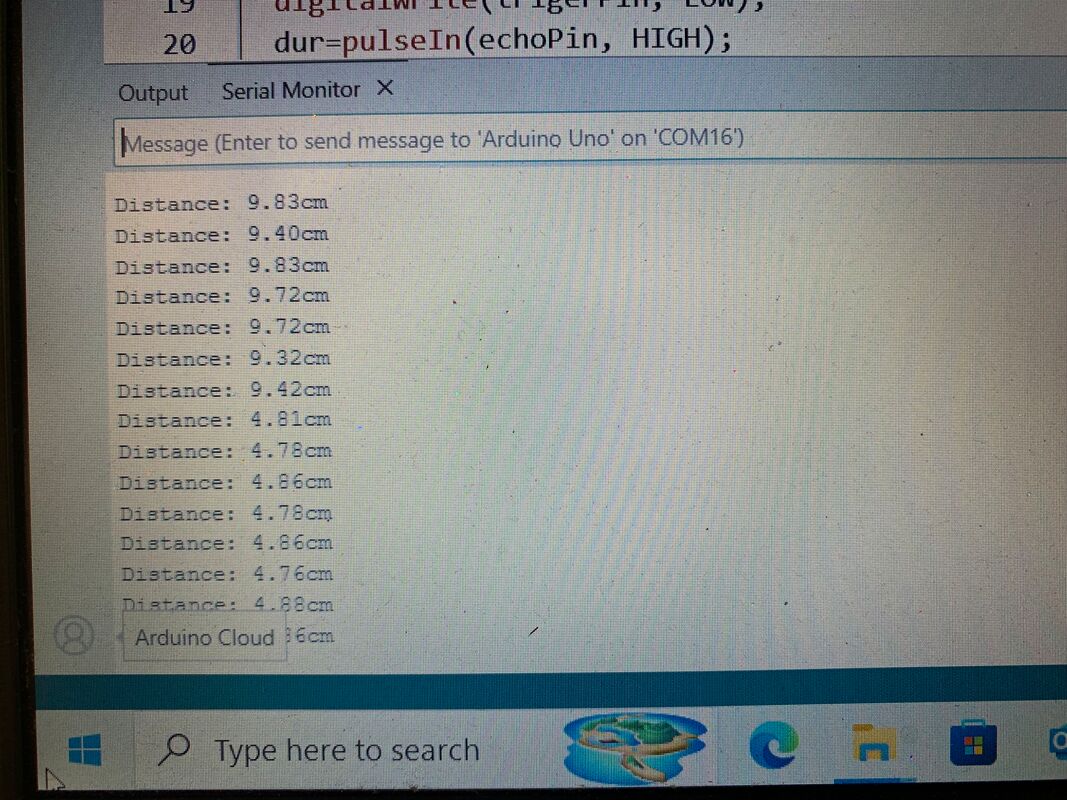
To see the results, open the Serial Monitor in the Arduino IDE and set the speed to 115200 bps.
Common problems and solutions
No distance readings
Possible causes:
- The object is too close to the sensor (less than about 2 cm).
- The object is out of the sensor's range.
- The TRIG and ECHO pins are not connected correctly.
- The common ground (GND) is not connected.
- An error in the program or in the choice of GPIO pins.
Unrealistic or unstable values
- The object has an irregular surface that reflects ultrasound poorly.
- The sensor is not pointed correctly at the object.
- There is noise in the power supply or a bad contact on the breadboard.
Using several ultrasonic sensors
- Trigger the sensors one at a time.
- Place the sensors farther apart.
- Make sure one sensor does not receive the signal sent by another sensor.
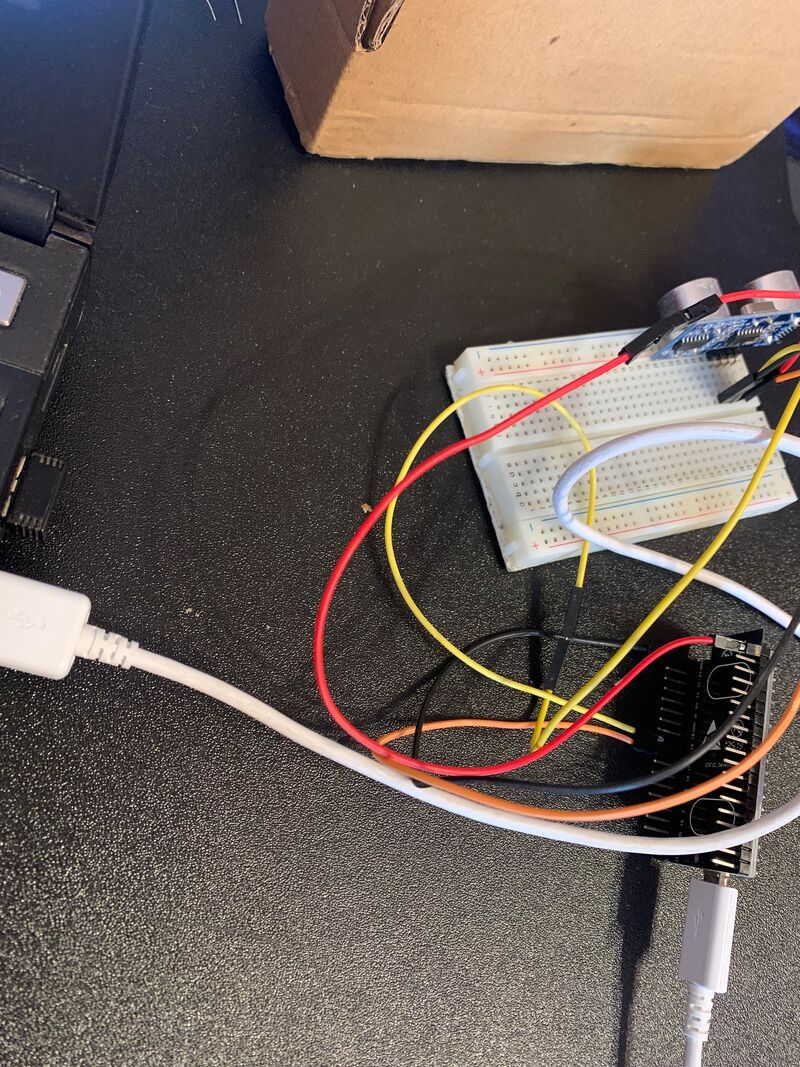
Practical task
In this task, use the HC-SR04 ultrasonic sensor and the ESP32 to check how the measured distance changes with the position of an object.
The goal is to understand how the sensor “sees” the space and how stable and precise the measurements are in real conditions.
Place an object (a box, a book or a wall) in front of the sensor and watch the values in the Serial Monitor. Try to measure the distance for the following values:
• 10 cm
• 20 cm
• 50 cm
• 100 cm
Compare the displayed values with the actual distance measured with a ruler and write down any differences.
Extra challenges
- Move the object slowly and watch how the values change in real time.
- Try different surfaces (cardboard, plastic, fabric) and compare how stable the measurements are.
- Check how the sensor behaves when the object is at an angle.
Why does the sensor sometimes show unstable values, and how do the shape and material of the object affect the reflection of the ultrasonic wave?
Limitations, interference and advanced details of ultrasonic sensors
So far we have seen how the HC-SR04 works, how the ESP32 sends the TRIG pulse and how it measures time with the ECHO pin. Now we look at real situations that can affect the accuracy and stability of the readings.
1. Minimum and maximum distance
The HC-SR04 has physical limits on its measuring range:
- Minimum distance: about 2 cm – the object is too close for the wave to reflect properly.
- Maximum distance: about 400 cm – the signal becomes too weak and does not return reliably.
If the object is too close or too far, pulseIn() often returns 0 because no ECHO signal is detected.
2. Surfaces and reflection of ultrasound
The accuracy depends on the material and shape of the object.
| Surface | Reflection | Stability |
|---|---|---|
| Flat and hard (wall, wood) | Excellent | High |
| Rounded (bottles, pipes) | Medium | Varies |
| Soft (fabric, sponge) | Weak | Unstable |
| Uneven (grids, bars) | Irregular | Unreliable |
If the object is at an angle, the ultrasound may bounce to the side and the sensor will not receive the echo.
3. Speed of sound and temperature
The speed of sound in air is not constant. Code usually uses about 340 m/s.
The speed of sound increases by about 0.6 m/s for every 1°C rise in temperature.
That is why small deviations (about 2–5%) can appear outdoors.
4. Interference between several sensors (crosstalk)
If you use several ultrasonic sensors, they can “hear” each other.
Problem: sensor A detects the signal of sensor B and gives a wrong result.
Solutions:
- Activate the sensors one at a time (sequentially).
- Place them at least 10 cm apart.
- Point them in different directions or use separators.
5. Timeout and program stability
The function:
duration = pulseIn(echoPin, HIGH);
can block the ESP32 if there is no returning signal.
A better solution is to use a timeout:
duration = pulseIn(echoPin, HIGH, 30000UL);
If there is no signal within the given time, the function returns 0 and the program continues.
6. Most common causes of wrong measurements
- No common ground (GND not connected)
- TRIG and ECHO pins connected incorrectly
- Bad contact on the breadboard
- The object is too small or reflects sound poorly
- The sensor is not pointed correctly
7. Quick check that the sensor works
- Test on a wall (the most stable result)
- Use a palm-sized object at 10–50 cm
- Move the object and watch the changes in real time
- If it keeps showing 0 or extreme values → check the wires or the sensor
8. Visual understanding
Short ECHO HIGH time → the object is close
Long ECHO HIGH time → the object is far
The ESP32 does not measure distance directly – it measures the return time of the signal.
Conclusion
This section explains the real limitations of ultrasonic sensors and the problems that appear in practice. Understanding these factors is important for projects such as:
- autonomous robots
- obstacle-avoidance systems
- parking sensors
- smart alarms
- IoT measuring systems
Reading ESP32 data in Processing
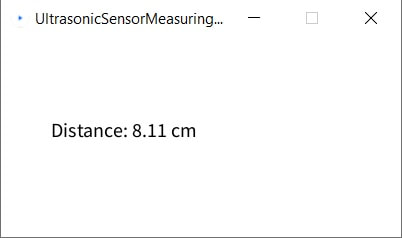
So far we have shown the results in the Serial Monitor of the Arduino IDE. The same data can also be displayed graphically in real time with Processing.
The ESP32 sends the data over the serial port as text:
Distance: 23.45 cmProcessing receives this text, analyzes it and extracts the number that represents the measured distance.
Processing code for receiving data from the ESP32
import processing.serial.*;

Serial myPort;
float val = 0;

void setup() {

  size(400, 200);

  printArray(Serial.list());

  if (Serial.list().length > 0) {

    String portName = Serial.list()[0];
    println("Connecting to: " + portName);

    myPort = new Serial(this, portName, 115200);
    myPort.bufferUntil('\n');
  }
}

void draw() {

  background(255);
  fill(0);
  textSize(20);

  text("Distance: " + val + " cm", 50, 100);
}

void serialEvent(Serial p) {

  String data = p.readStringUntil('\n');

  if (data != null) {

    data = trim(data);

    if (data.startsWith("Distance:")) {

      // after "Distance:" comes the number, then " cm" – keep only the number
      String value = trim(split(data, ":")[1]);
      val = float(split(value, " ")[0]);
    }
  }
}
How does this code work?
- The ESP32 sends the data as lines of text.
- bufferUntil('\n') makes Processing read the whole line at once.
- serialEvent() is called automatically when a new line arrives.
- The line is split with
split(data, ":"), and only the number is kept (the unit “cm” is removed). - The value is stored in the variable
valand shown in the window.
Why Processing instead of the Serial Monitor?
Processing lets us not only read the data but also visualize it:
- real-time graphs
- animations of a moving object
- radar-style distance display
- interactive simulations
This way the ESP32 becomes part of a graphical system for displaying sensor data, not just text output.
Check your knowledge
Open the quiz
Quiz: ultrasonic sensor and ESP32
1. How does the HC-SR04 measure distance?
2. Why is the time divided by 2 in the distance formula?
3. If the sensor is powered from 5 V, what must be done with the Echo pin?
4. Why is it useful to call pulseIn(echoPin, HIGH, 30000)?