
MIKROBIT AND ITS USE IN PROCESSING APPLICATIONS
The movement of graphic objects, which we draw in some application in Processing, can be tied to mouse and keyboard events. For example: We can move by pressing the arrow keys, or another key that we specify. Instead, we can use a microcontroller, e.g. Micro:bit, by using it to measure e.g. acceleration, or we produce some event, and then we transmit that information through the serial port to the computer. This information is further used by the application in Processing, which also reads it from the serial port. Let's learn more about Mikro:bit below and look at examples in Processing that use one or more micro:bits.Microbit device
Microbit is a handheld programmable microcomputer. It consists of a board, processor, sensors, diodes, input-output serial port, buttons. It can be connected to Processing which is suitable for creating visual applications. It is suitable for teaching children programming.By connecting microbits and processing, interesting applications can be created, because the already rich library suitable for creating animations and simulations from physics can be enriched by measuring temperature, acceleration, light intensity, distance to objects, etc. using microbits.
It can be programmed using scratch, javascript or python programming languages. Here are some recommendations:
For programming in scratch or javascript, use Microsoft's MakeCode: https://makecode.microbit.org/
To program in Python, install the working environment Mu: https://codewith.mu/en/download
The following pictures show the front and back of the microbit
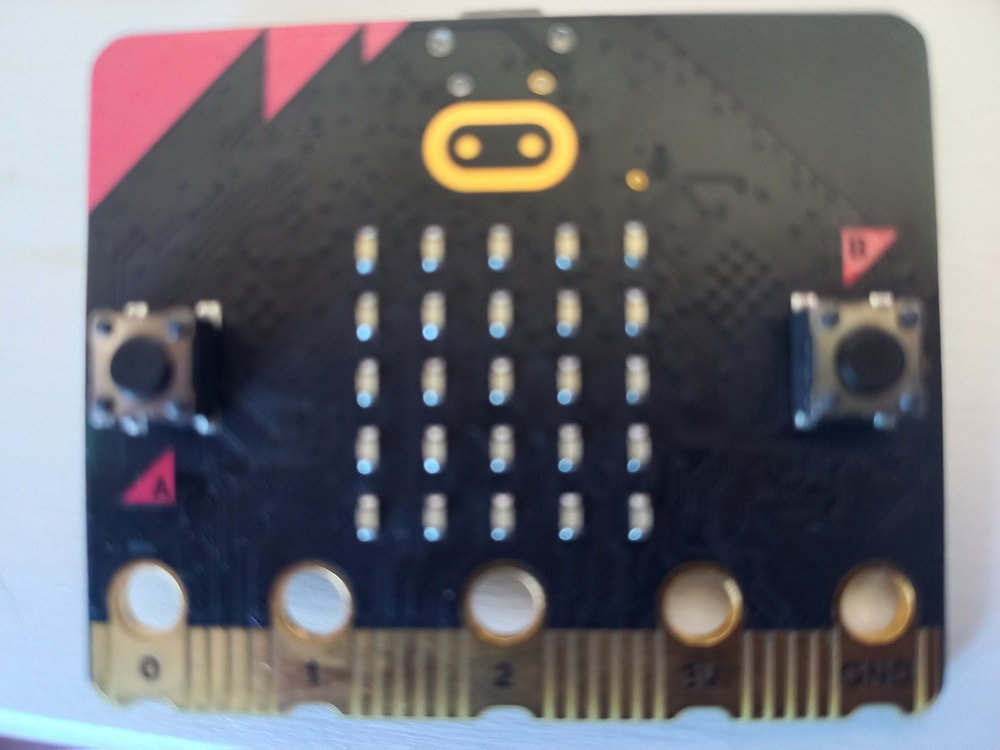
Figure 1: Microbit - front side
|
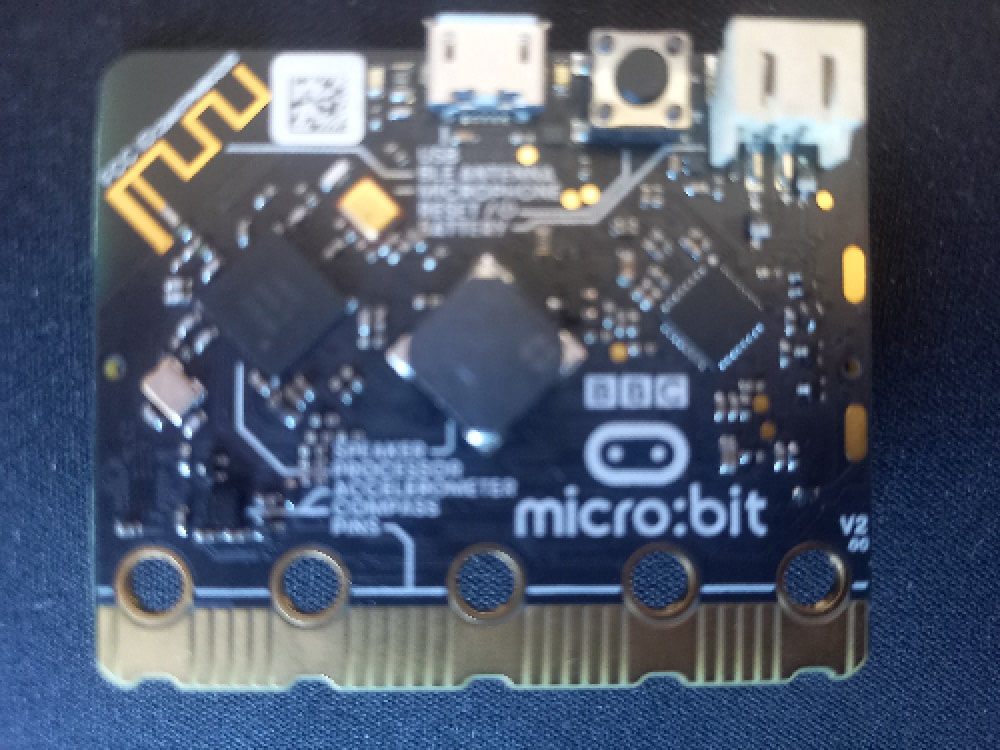
Figure 2: Microbit-back side
|
Components of microbit
Components of microbit:- Front panel
- Back plate
- Screen with 25 LEDs
- The keys are located on the left and right side of the screen A and B. The key press is registered by the microbit. There is also a reset button, ie. to restart the program, i.e. reload it
- The compass determines the position (side of the world) and can measure the strength of the magnetic field
- Accelerometer. It detects the movements of microbites
- Temperature sensor. This sensor measures the temperature of the microbit's processor.
- Pins. On the edge of the microbit there are 25 leads, 5 large and 20 small. Various additional devices and sensors can be connected via these pins.
- Bluetooth. This antenna with which the microbit is equipped is used for wireless connection with other devices. this connection can be made with other bluetooth devices, with a computer, a mobile phone or some other device.
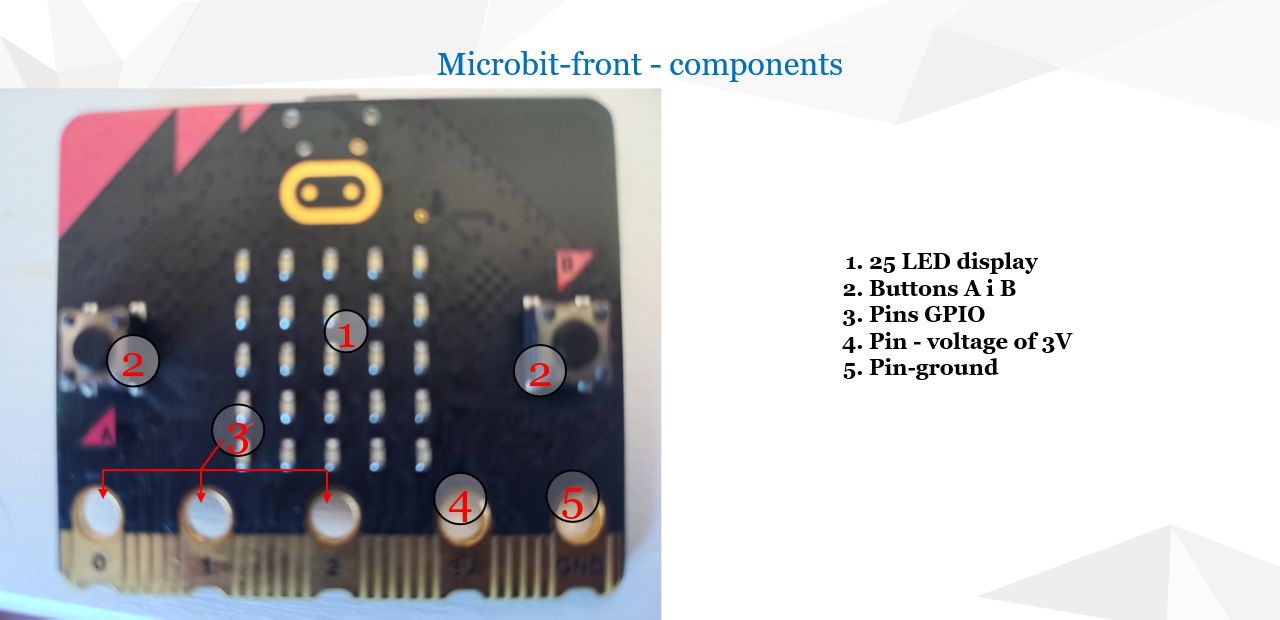
Figure 3: Components on the front of the Mikrobit
In the next figure you can see a detailed view of the Microbit from the back.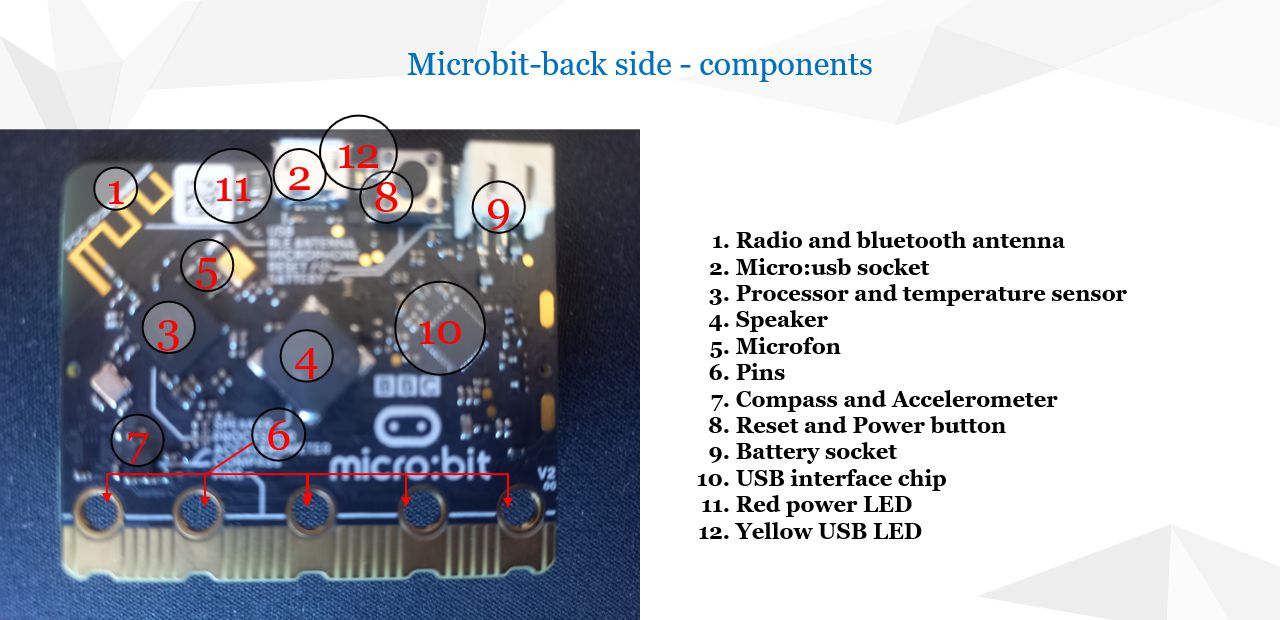
Figure 4: Components on the back of the Microbit
Microbit workshop
Microbit workshops are an integral part of the creative programming course organized by the Regional Center for Talents "Mihajlo Pupin" in Pancevo:
Creative programming
Pong game
The old pong game, which realizes the movement of the rectangle in the horizontal plane left-right and the ball that moves vertically and bounces against the rectangle and the walls, can be made in processing and connected to the microbit. The following video shows how this can be done:Pong Game part 1: Make code for microbit
This video shows how to create a program for the micro:bit that will later be connected to a processing application and where gesture events will be used for moving some objects. The application that will be created in the process will be the old "The Pong" game.Pong Game - part 2: Application in processing
This video shows how to create the Pong Game using the processing application. The application uses events received from the associated microbit to move objects within the processing.First, we will show how to connect the microbit to the processing application. Mikrobit produces 3 events: TitleLeft, TitleRight and shake, which respectively should: change the direction of movement of the rectangle, to the left, to the right and to reset the game. In the part of the program that should be on the microbit, we will define these events and using the selection command, and depending on the triggered event, send the appropriate message to the serial port: "l" for titlLeft, "d" for titlRight and "r" for the shake event. We can see an overview of all events on microbit in the following picture:
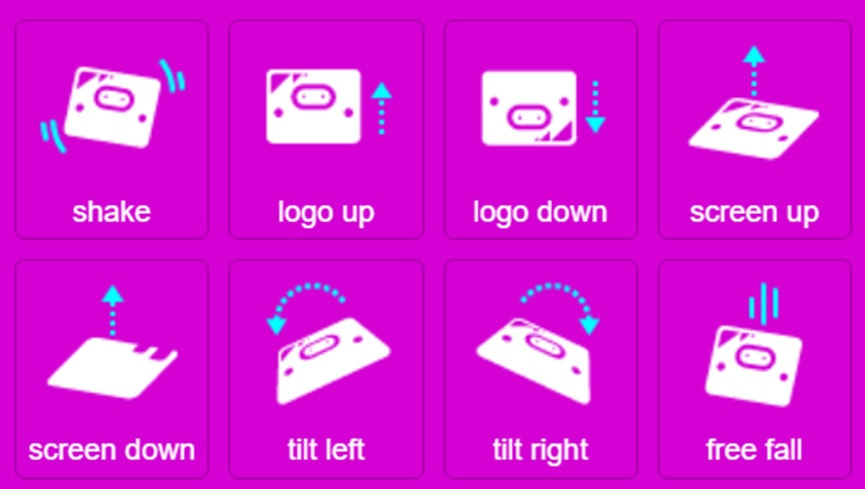
Figure 5: Gesture events on microbit
First we will create the code in microbit using makecode project and copy it to microbit. You can see the complete procedure in the exposed video. Within the onStart event, we will insert a while loop block with the condition true, and inside the loop a selection block, i.e. if-else if... statement, which can be seen in Figure 6: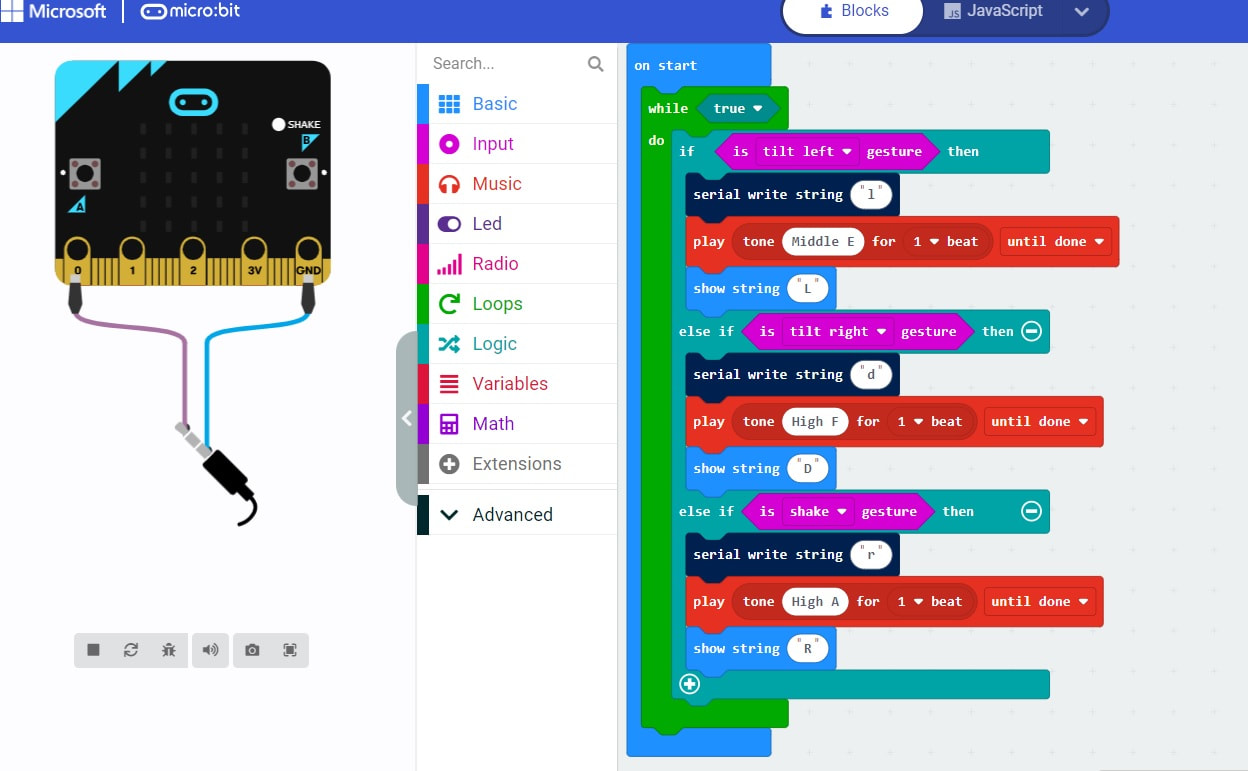
Figure 6: Game Pong-Microbit program in scratch
or the javascript code: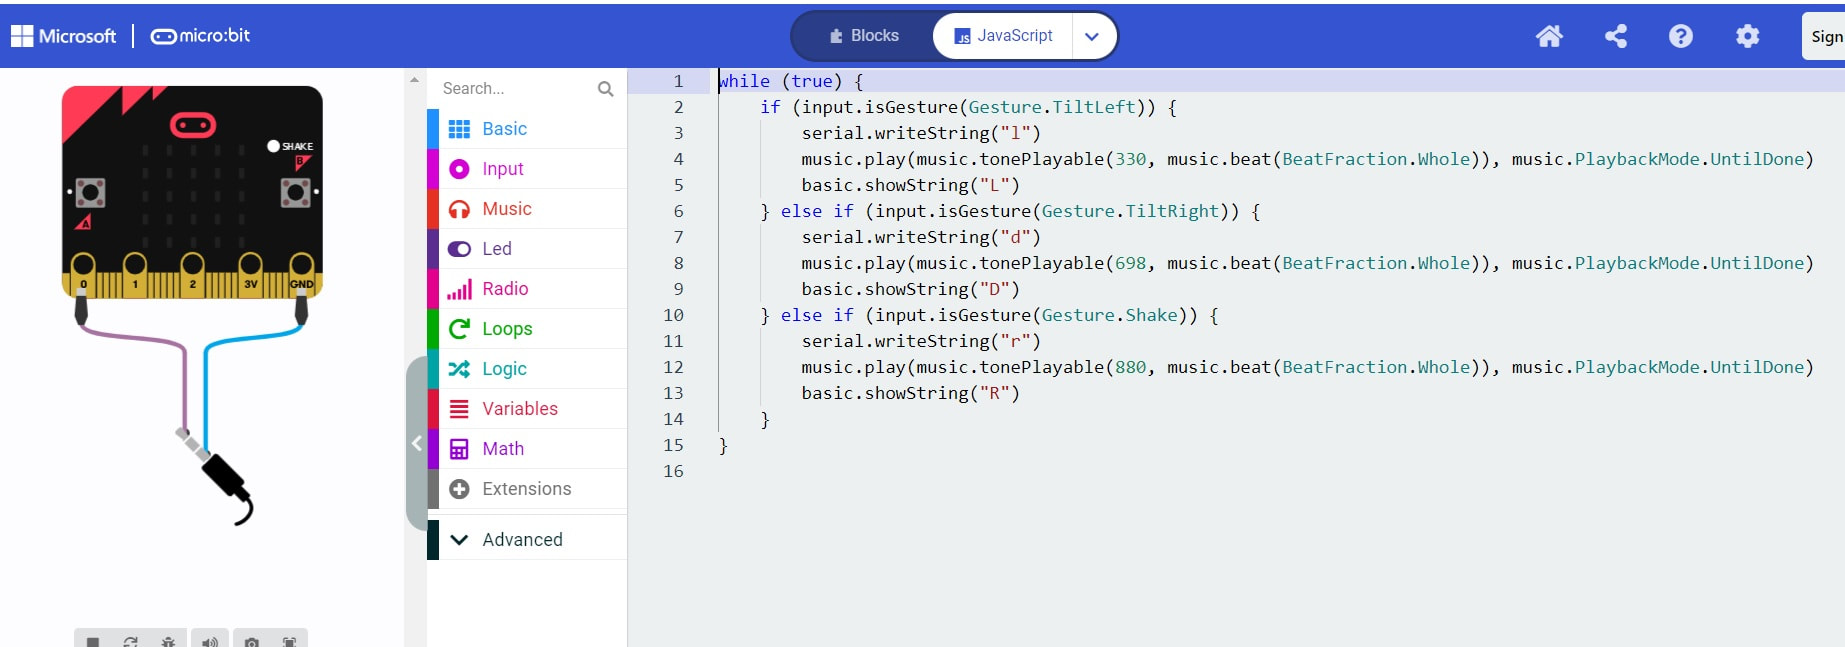
Figure 7: The game Pong-Microbit program in javascript
We start the code in Processing by creating setup and draw methods and adding variables: port(Serial), k(int), trigerred_event(String)The first part of the task is to accept the text from the serial port and depending on whether it is "l", "r" or "s", write the text to the application window in processing: You can see the code that does this below:

Figure 8: Pong game - Code in processing - start
To create a port, we need the Serial class, which is in the library of the same name, and which we need to import in order to use it.The variable vx initialized to zero will actually be the change of position after each call to the draw method (20 times per second), so the speed of the rectangle movement.
The whichEvent variable is the event text that we will print on the window depending on the event produced by the microbit.
Within the setup() method, the window size is created at 600*600px and then the port is created as an object.
Serial.list is a list of available ports, so we see that a port is created based on the first element in the list.
The bufferUntil(10) function indicates that only one line of text will be read, ie. until a character with the code "10" is encountered, which is the end-of-line character.
Inside the draw() method, after setting the background, it is checked whether a port is available, and if so, the function serialEvent(Serial port) is called.
In this function a selection is used which examines the first character in the read string from the port and if it is "l"(titleLeft) then the speed value vx is set to a negative value in this example vx=-2. If it is "d"(titleRight) then vx=2.
The text on the screen is printed with processing's text() function, which accepts as the first parameter the text to be printed, and the second two refer to the position in the xOy coordinate system. You can see the continuation of the code in the following images:
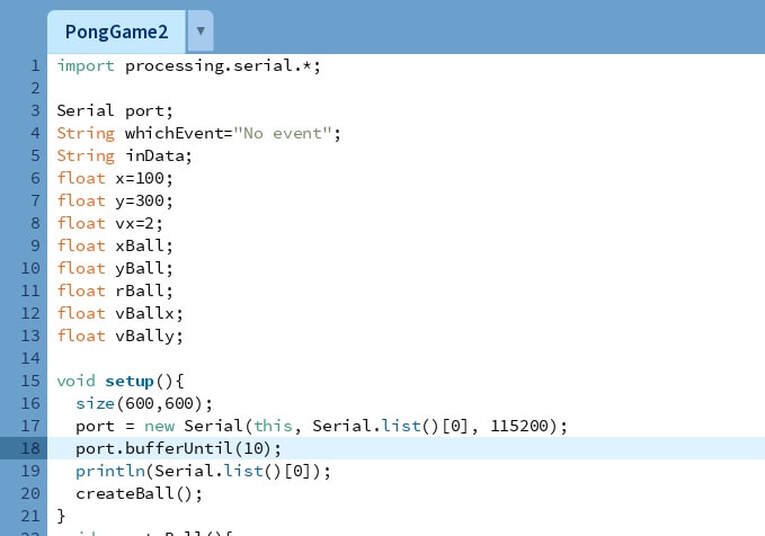
Figure 9: Pong game - Code in processing - variables
Here we see that the variables have been added:vx - speed of the rectangle ,
x,y - position of the upper left corner of the rectangle,
xBall,yBall - position of the square in which the ball is written (ball position)
rBall- radius of the ball
vBallx- speed of the ball in the x direction
vBally- speed of the ball in the y direction
Inside the setup() method, a call to the createBall() method was added, which should create a new ball from scratch in the upper part.
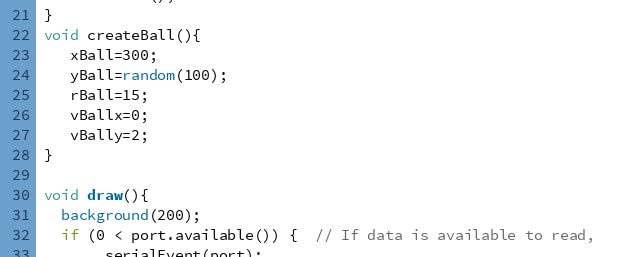
Figure 10: Pong game - Code in processing - the method: createBall()
In the draw method, add the code that draws a rectangle on the x and y coordinates, then the code that draws this circle.After drawing the geometric shapes, the following conditions are checked: condition Whether the rectangle has reached the border of the frame on the left or on the right. When the left or right touch limit is reached, the direction of the rectangle's speed changes.
The next condition that is checked is whether the ball, when reaching the upper level of the Edge of the rectangle, whether it bounced or not.
And at the end of the draw() method, the x coordinate of the rectangle is increased by the value of the velocity of the rectangle , And then the y coordinate of the circle changes according to the velocity vBally.
The draw method:
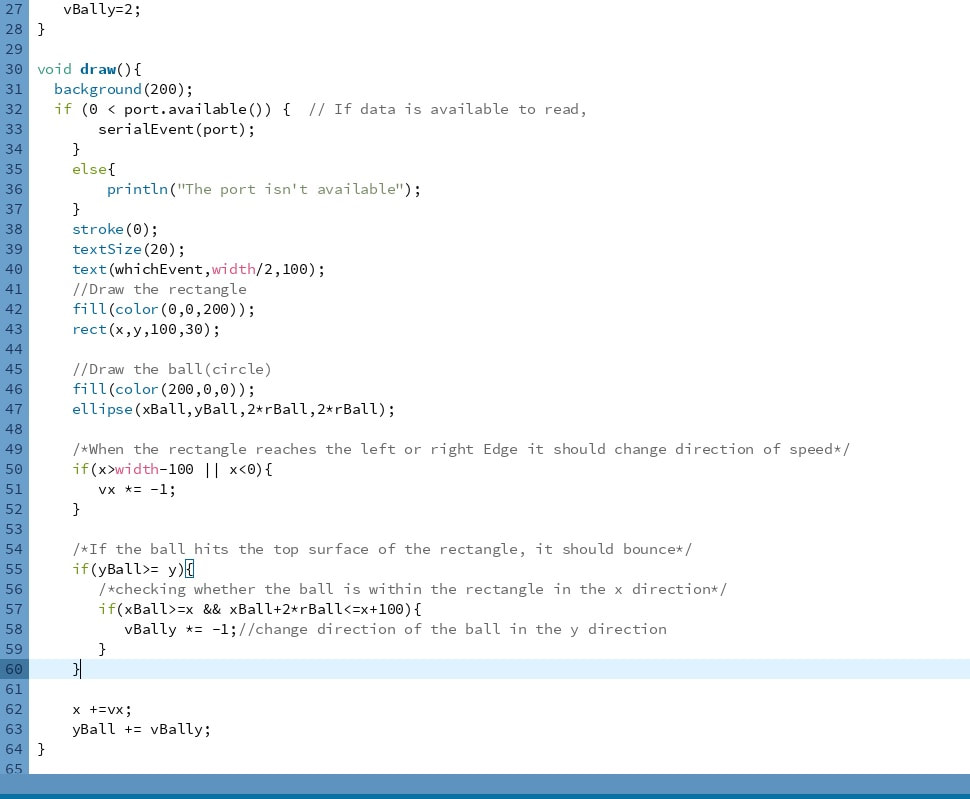
Figure 11: Pong game - Code in processing - the method: draw()
In the draw method, after writing the text, first a blue rectangle is drawn, and then a red ball, at its current x and y coordinates.After that, the boundary positions for the rectangle are checked, i.e. whether it has gone outside the field of view of the application window. In case it is, the direction of the velocity of the rectangle is changed.
Further, one can see the code that increases the positions of the rectangle in the x and the ball in the y direction by the value of the respective velocities vx and vBally.
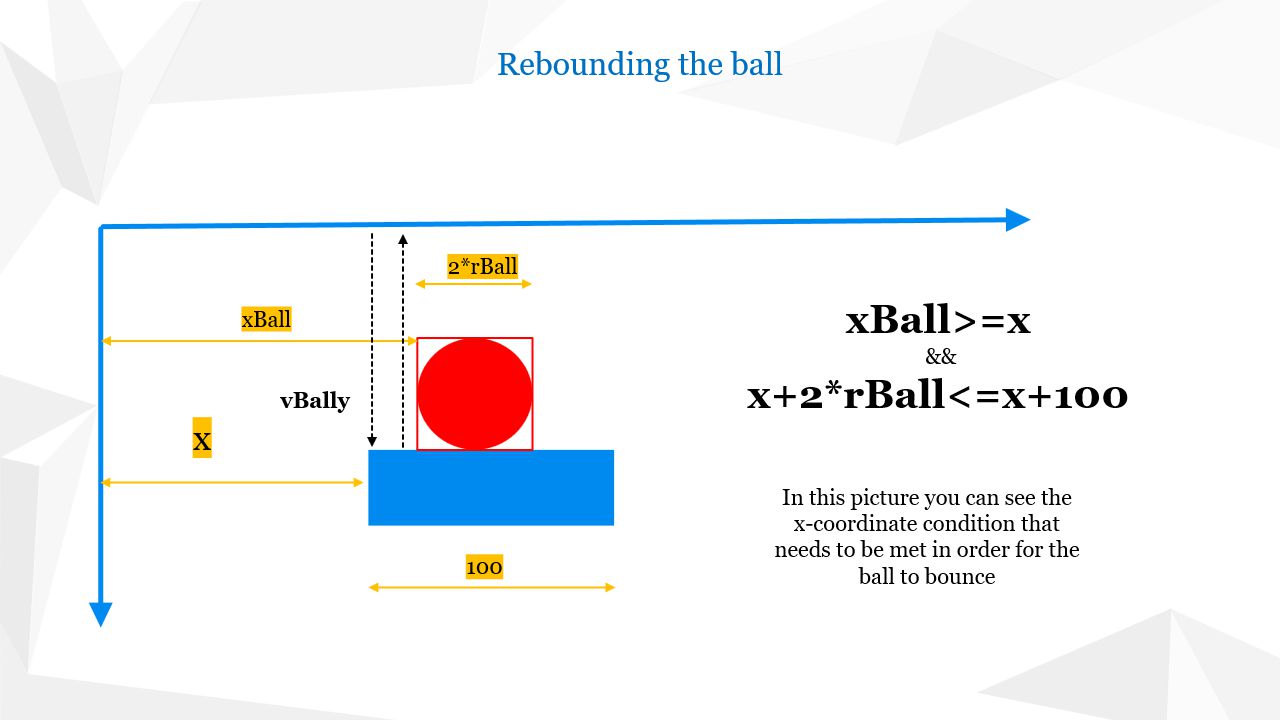
Figure 12: Pong game - Code in processing - the condition for the hiting
The following code shows how to check if the ball has bounced off the top surface of the rectangle by first checking the condition that the ball's y coordinate has reached the level of the top surface of the rectangle. If so, the 2 cases should be further distinguished.The first, that the x coordinate of the ball's frame is between the left and right surfaces of the rectangle, and if so, there was an impact and the ball bounces, i.e. changes direction of speed to higher.
Second, if the x-coordinate condition is not met, a miss has occurred and the ball continues to move until it reaches the bottom edge of the frame, when it disappears and a new ball is created. This case will be considered later in the part 3.
The following problem will also be considered in the sequel 3: We observe in the following picture two different and iterations of the ball and the rectangle. If it happens that when the ball reaches the level of the upper edge of the rectangle and if it misses the rectangle In that case it means that the condition for the x value was not met. But if immediately after the miss this condition by x is fulfilled, the unwanted will happen, which is that the ball bounces, although in that case it should not bounce.
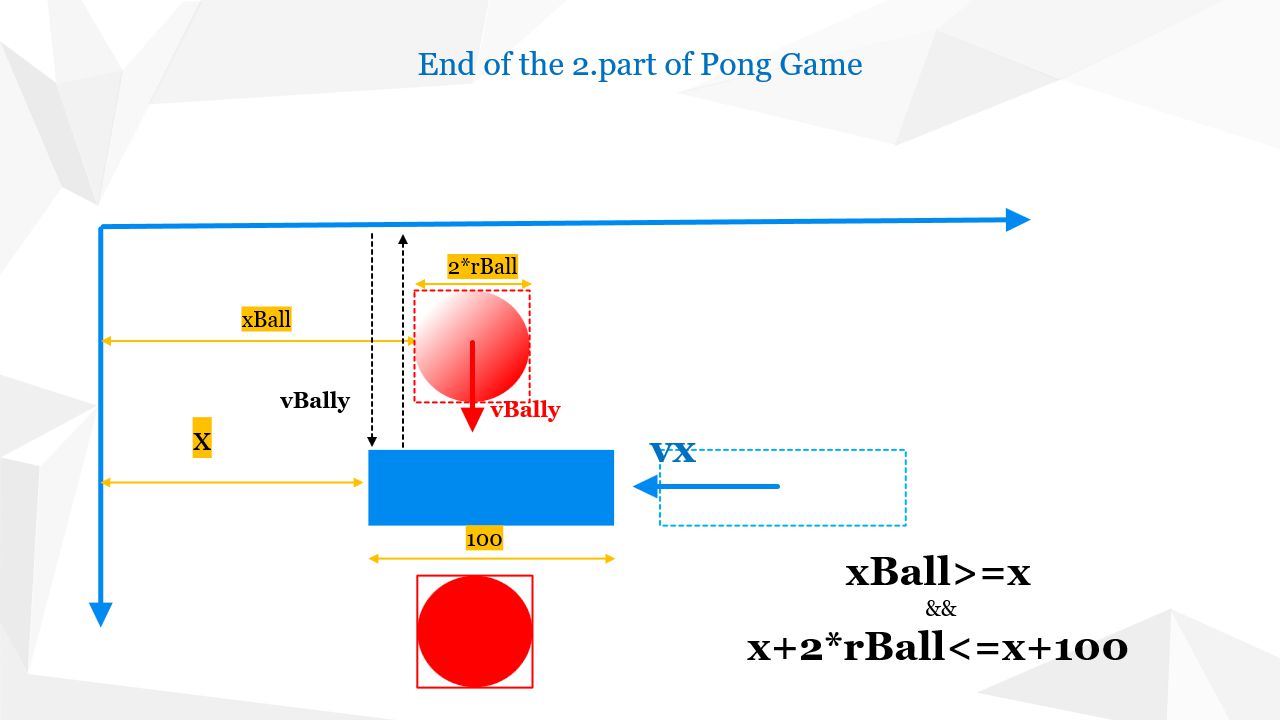
Figure 13: Pong game - Code in processing - the condition for the hiting- The problem of unwanted bounce of the ball on the Edge
Finally, we see the serialEvent() method, which was already explained earlier. After launch we will see:
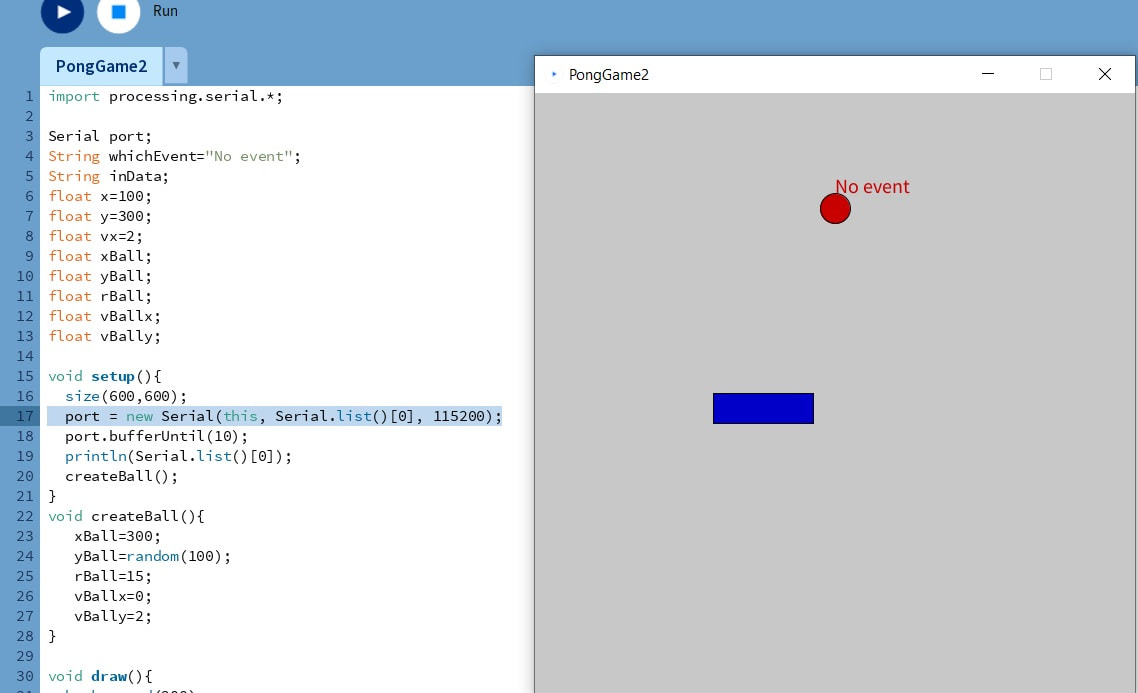
Slika 14: Igrica Pong- Kod u processingu - izvršenje aplikacije
The game is completed in the third part, i.e. in video number 4. Watch below:| Previous |< Basics of processing using Java |
Next Vectors in Processing >| |