
CREATING A DJANGO WEB APPLICATION - CREATING A HOME PAGE
| In order for the title page to be displayed in the browser after entering the url address in the address bar, it is necessary to call the function that will require the page to render. All the urls of an application, the functions performed by django, the html code that displays the page and the data model are in different files, according to the Model View Templatearchitecture that is characteristic of Django framework. |
Creating a home page in the Django -video |
Creating urls in the Django web application
The url that the user types in the web browser should be associated with the corresponding function in the controller, which will be performed by calling that address. These links are entered in the appropriate urls.py file of the specific application.The main urls.py file of the project imports the url links written in the urls.py files of the installed applications.
We will create the appropriate url connection with django's admin functions within the main urls.py:
urlpatterns = {
from django.contrib import admin
from django.urls import path
from django.conf.urls import include, url
admin.autodiscover()
urlpatterns : [
]from django.urls import path
from django.conf.urls import include, url
admin.autodiscover()
urlpatterns : [
url(r'^', include('naslovna.urls')),
url(r'^', include('registracija.urls')),
path('admin/', admin.site.urls),
}url(r'^', include('registracija.urls')),
path('admin/', admin.site.urls),
Add urls.py file inside application "naslovna"(home eng.)
Each added module should have its own file where its rooting maps are located.We will add the urls.py file inside the header(module) folder with the following content:
from django.conf.urls import url
from naslovna import views
app_name = 'naslovna'
urlpatterns = [
Figure 1: url.py file of the "naslovna" application within the Django web applicationInside it are the name of the application, because through the name this file is linked to the main urls.py file of the project and a redirect folder for the home page index. When the user searches for the home page of the application on the address bar, the index method inside the view will be executed. from naslovna import views
app_name = 'naslovna'
urlpatterns = [
url(r'^$', views.index, name = 'index'),
]In the main urls.py added:
from django.conf.urls import url
from naslovna import views
app_name = 'naslovna'
urlpatterns = [
Figure 2: url.py file of the "naslovna"(home eng.) application within the Django web application-2Let's comment on the inclusion of home.urls because we haven't prepared view.index yet,from naslovna import views
app_name = 'naslovna'
urlpatterns = [
path('admin/', admin.site.urls),
url(r'^', include('naslovna.urls')),
]url(r'^', include('naslovna.urls')),
and then start the application with the command
The default django page will be displayed:

Figure 3: Default home page within the Django web application
Creating view and template
Note that the logo_creator application does not yet have a home page.Creating view
Let's create an html home page within the homepage application, respecting the MVC architecture, ie. we separate the model, controller and visual part (view).When the Home application was created, the files model.py, view.py were created. We will now be based on creating a view, that is, the code to be written in that file. Here we actually write the functions that need to be associated with the appropriate urls. We write this link in the urls.py file
To get the home page. Let's first create a link in urls.py (see Figure 1)Let's look at the first url. It links the address (www.logo_creator.herokuapp.com/) to the index function that will be defined in the view.py file.
Let's now create that function in the view.py file:
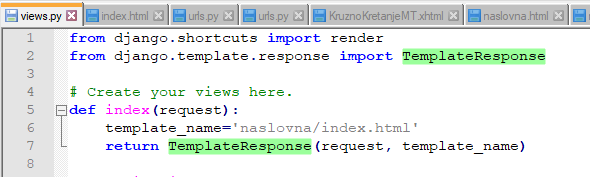
Figure 4: Logo Creator view: -index method
Now you need to link the index function to the index.html file. The path to that file is "naslovna / index.html". This is the relative path of the templates folder that we will create the root folder:First we need to set the path to the templates folder in the settings.py file:
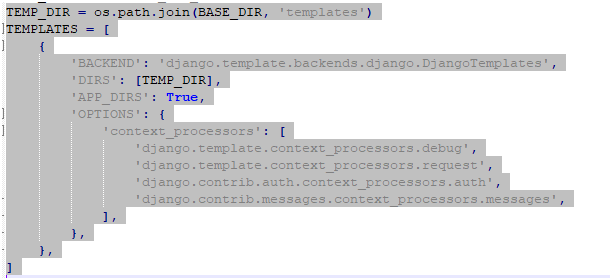
Figure 5: Logo Setting creator: -template setting
Dakle struktura foldera i fajlova unutar foldera projekta(root):
logo_creator/
manage.py
requirements.txt
Procfiles
Procfile.windows
naslovna
templates/
naslovna/
index.html
Creating a common template base.html
That part of the template that is repeated in all web pages can be singled out separately, and then included at the top of the page index.html or some other.The content of base.html :
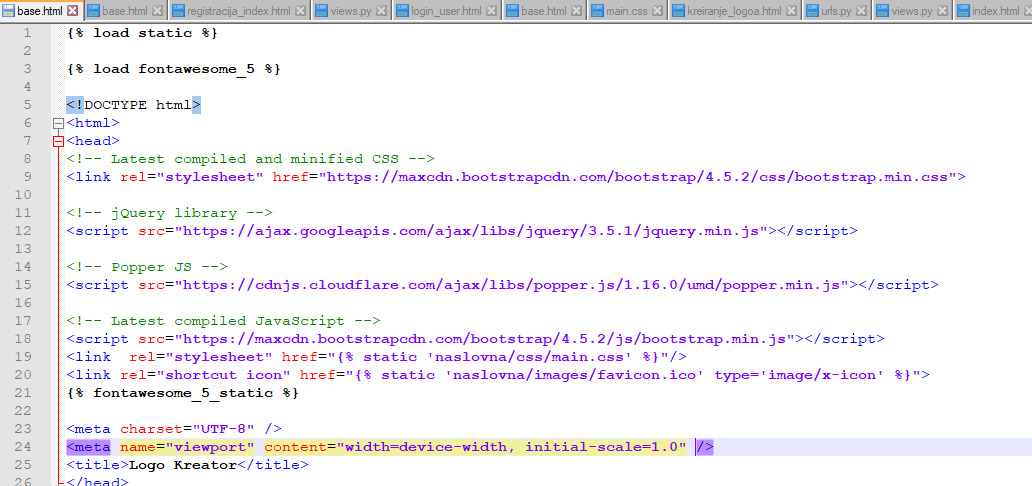
Figure 6: Logo Creator template: -base.html start of file
Bootstrap 4 and static files are inserted at the top of the file. More words on that will be written later. Next, an html page is inserted and the header is visible in the first image. Here you need to insert links and scripts, ie connect to css and javascript files.
base.html- body tag:
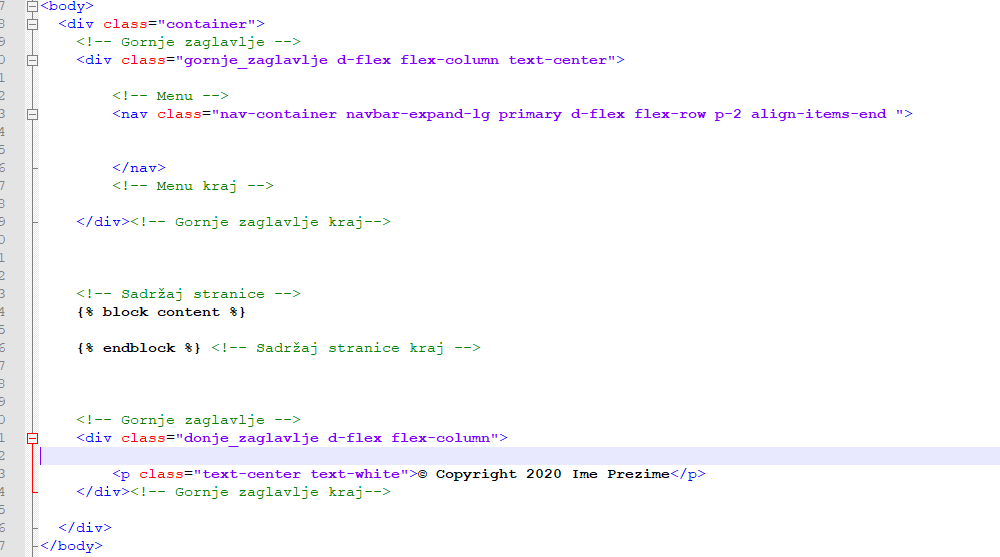
Figure 7: Logo Creator template: -base.html page content
Here it can be seen that the body consists of the main <div> tag, arranged by the container class, which is further divided into 3 parts:- Header
- Content -middle part
- Footer
Creating a website
Let's pay attention to the content:

Slika 8: Logo Creator template:-base.html -block content
The html code that will be created in the index.html will be inserted in between {% block content %} i {% endblock %}
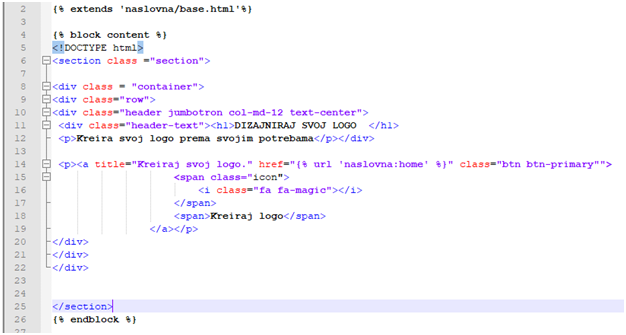
Figure 9: Logo Creator Template: -index.html
In order for this html file to be linked to base.html, it should be written at the beginning of this file
{% extends ‘naslovna/base.html’ %}
Content between block content tags will be inserted between the same tags within the base.html file.
After starting the server, we launch the application locally and the title page will be displayed:
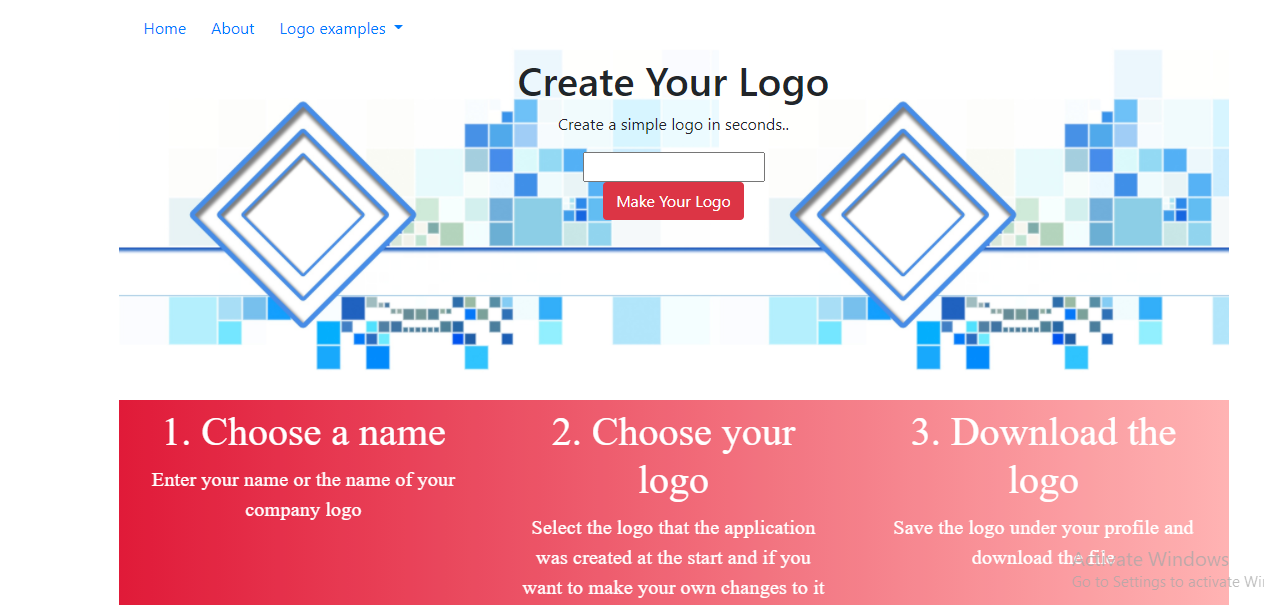
Figure 10: Logo Creator home: -show without style
It can be noticed that the style has not been applied. It is necessary to define "static" files, css, images, etc., place them in a special folder, and in the template make the appropriate link to these files (links).
Creating static files-Django
Static files are additional files used in the project, such as images, css, javascript files. The static folder is usually placed in the root of the project. In settings.py, the path to the STATIC_ROOT folder and the url, which is usually / static /, must be set, but can also be defined differently using STATIC_URL. Static files will be copied to the location defined with STATIC_ROOT, after the command python manage.py collectstatic in the command prompt. Static files are stored locally in the directory defined bySTATICFILES_DIRS = [(os.path.join (BASE_DIR, 'assets'))] within settings.py
This directory must not be the same as STATIC_ROOT. The assets are usually left blank at the beginning
In the settings.py:
# Static files (CSS, JavaScript, Images)
# https://docs.djangoproject.com/en/2.2/howto/static-files/
STATIC_ROOT = os.path.join(BASE_DIR, 'assets')
STATIC_URL = '/static/'
STATICFILES_DIRS=[(os.path.join(BASE_DIR,'assets'))] u okviru settings.py
Within the html file template, this must be enabled. At the beginning of the base.html file we will include static files:# https://docs.djangoproject.com/en/2.2/howto/static-files/
STATIC_ROOT = os.path.join(BASE_DIR, 'assets')
STATIC_URL = '/static/'
STATICFILES_DIRS=[(os.path.join(BASE_DIR,'assets'))] u okviru settings.py
{% load static %}
The Assets folder is located in the root of the application, which is shown in the following image:
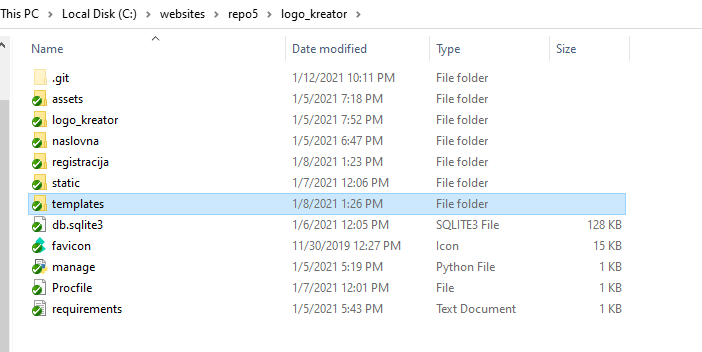
Slika 10: Logo Kreator -sadržaj root foldera
The contents of the assets folder are static files, which are: images, css which is shown in the following image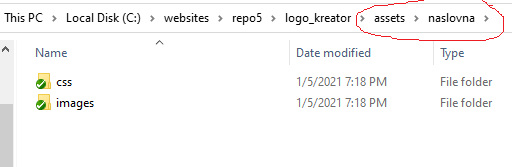
Figure 11: Logo Creator - contents of assets (static) folder
It should also be noted that for each application (module) within the main application, static files are created separately for each of these applications, so that a separate subfolder is created for each of them. For example, the "title" for the application of the same name, which can be seen in the image in the path (rounded).
Continue creating the home page
On the home page, there is a welcome text, a background image and a button that leads further to the selection of the logo. By clicking on the button, the user will first be asked to log in. If the user does not have an account, then registration is required.The index.html page we got from the central part of the home page we created in the previous blog should be modified by adding "load static" to the beginning, as shown in the following image:
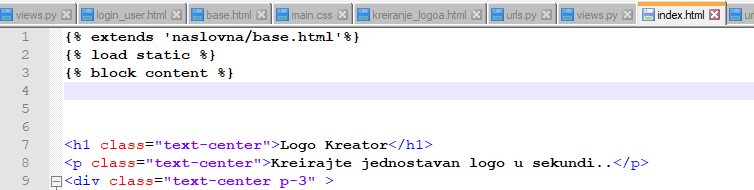
Figure 11: Logo Creator template-index.html-load static
It is also necessary to change the path in the src attribute of the img tag, which displays the image, by adding the word static, which is actually the path to the assets folder where the static files are located, as shown in the following image:
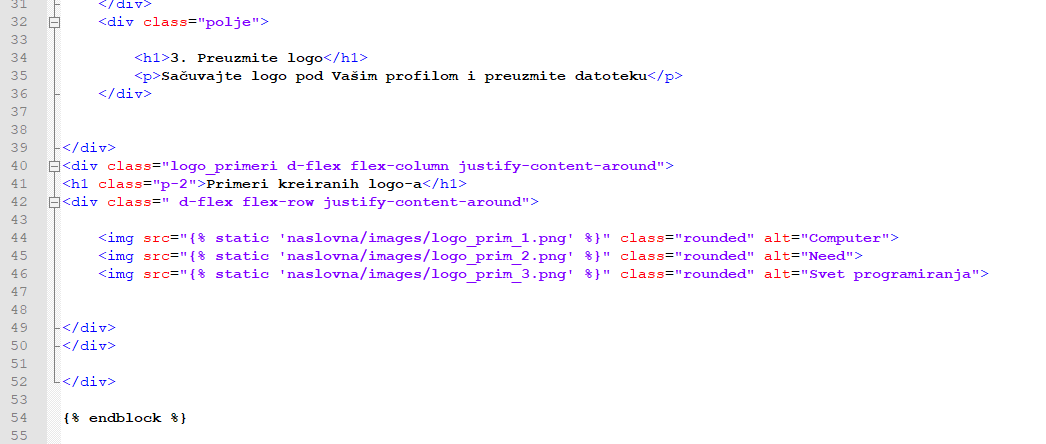
Figure 12: Logo Creator template-index.html-adding "static" url to path
After refreshing the page, you will see the title page shown in the image below:
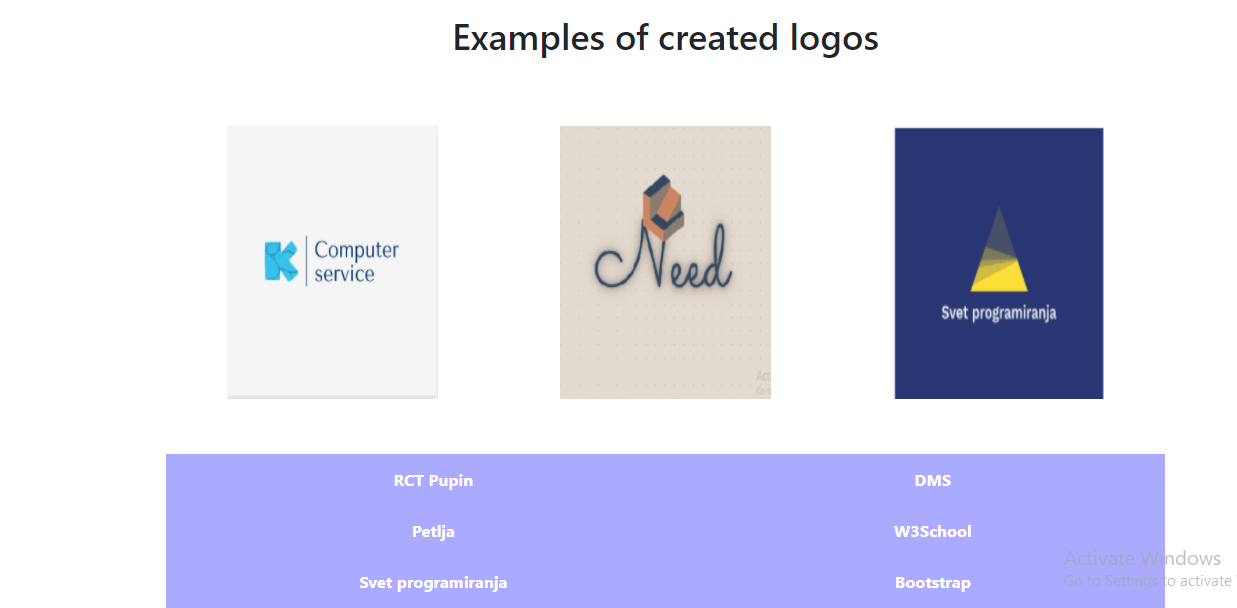
Figure 13: Logo Kreator cover-full view
| Previous |<Creating Django Web Applications-Getting Started |
Next Django application and database>| |