
JAVA AND PROCESSING - INTRODUCTION
Processing is an environment that is built as a plugin for programming animations as well as visual applications, with good and easy interaction with the user.It is written in Java and can be treated as a plugin that contains support ie. An API with functions for creating animations and visual applications. It is based on writing a sketch.
Processing is open source.
It has its own environment PDE (Processing Development Environment) for work where you can choose the language in which the code will be written. It can also be connected to the Eclipse IDE or some other Java development tool (IDE), by adding the libraries that contain processing to the existing Java libraries. At the time of writing the tutorial, Processing 4 is used
The API consists of several libraries that, in addition to the basic functions, support: sending data over the network, reading images from the camera, saving images in pdf format.
Processing was originally designed to make it easier for developers to develop creative animated and interactive applications with its simple syntax and numerous possibilities for creating graphics, images and animations.
It is still used in server and desktop applications, but if it is necessary to incorporate some animation into a website, it is better to use the javascript library for processing p5js.
Until version 3, it was possible to use the processing version in Java, but it was necessary to add the prosessing.js script inside the site. Development and support for this script has ceased to exist and does not support versions of processing from 3 onwards. So, if you create a web application as a ".pde" and want to embed it in a web page, you must first modify the code you wrote in version processing 4, for example. before uploading it to the website because the new functions are not supported, and then uploading the processing.js library, which will translate the code written in java into javascript code. That is why it is smarter, if you are already creating a website and want to enrich it with some animation created in processing, to use the p5js library for development. Read more about it in the article: happycoding.io/tutorials/p5js/which-processing
Installation of processing
It can be downloaded from the site:processing.org/download
PDE environment
Start processing 4 by double-clicking on the icon and the following environment will start: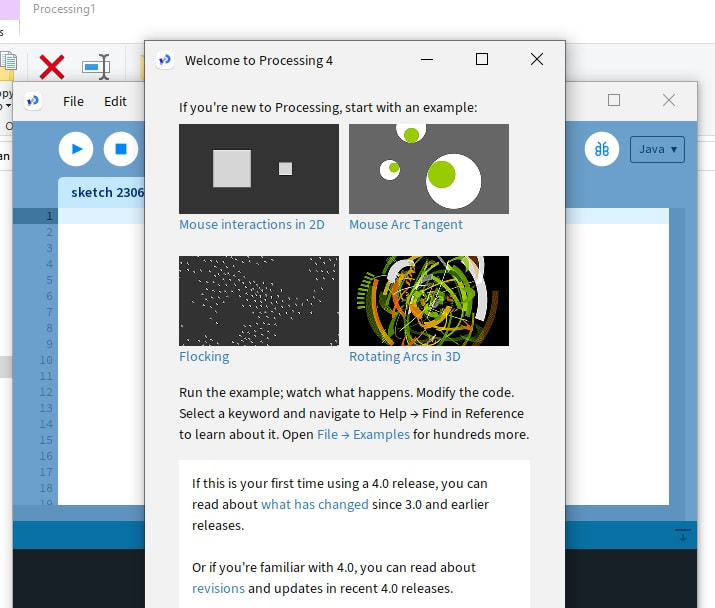
Figure 1: Starting PDE for processing
If you are a beginner, you can choose one of the examples offered, and then transform the existing code or start the application from scratch. In order to program in processing, you need prior basic knowledge of the JAVA programming language or one of the supported ones: javascript, python, etc. This tutorial is based on the Java programming language.Code organization in processing
The files in which the code is written are actually sketches and they are placed in a folder called sketchbook. This folder can be changed using PDE by clicking onFile->Sketchbook
This can be seen in the following image:
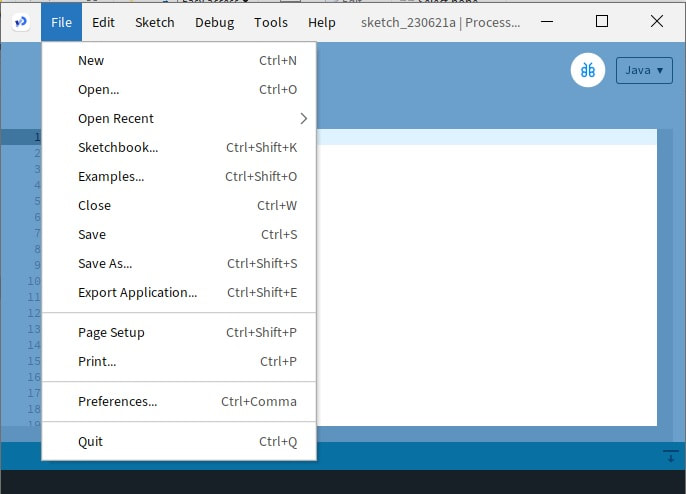
Figure 2: Processing Integrated Environment
Exporting the application can be done by clicking onFile-> Export Application
From Java to Processing
If you are familiar with programming in JAVA, the basics, as well as the basics of object-oriented programming: classes, objects, inheritance, etc. then assuming that the necessary libraries for processing have been added, the code in the Eclipse IDE environment would look, for example, as in the following figure: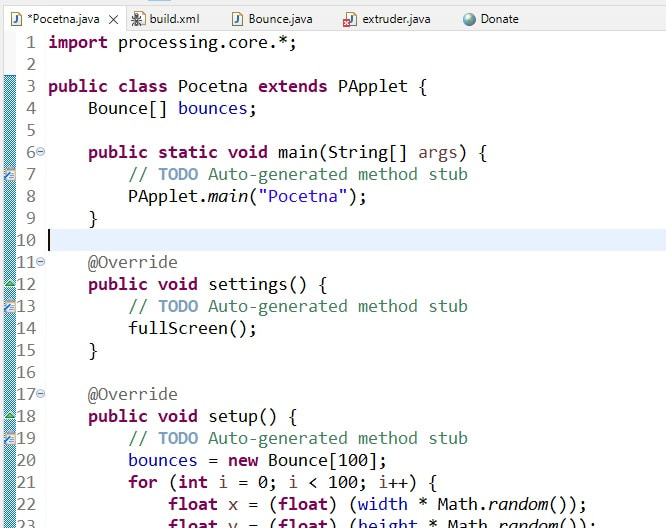
Figure 3: Main class in Eclipse Part 1
At the beginning of the main class, in order to program in processing, you need to import the basic library:import processing.core.*;
This is just a basic library, and specific ones should be added as needed.So the initial class must inherit from the PApplet class. You should also notice the revised methods from the PApplet class: settigs, setup (in Figure 3) and draw (see Figure 4).
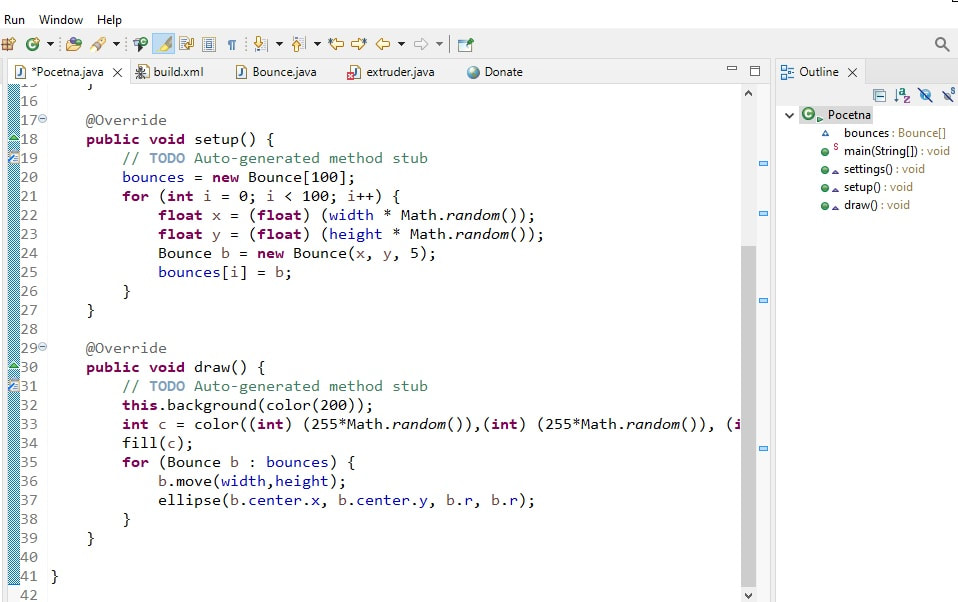
Figure 4: Main class in Eclipse Part 2
In the navigator on the right, you can see the titles of these methods, and by clicking on the title, the cursor is positioned on the corresponding method.The sketch coding in the PDE environment is different because the import of the basic libraries has already been done in the background, the title line of the main class has been written and the setup and draw methods have been inserted for overriding.
Therefore, it is not necessary to write: "class Main" e.g. and it is not necessary to write "import processing.core.*;". (see figure 2).
Metods: settings, setup, draw from PApplet class
Given that animations are obtained by first creating objects and initializing them to their initial state, and then changing the state of objects through Frames at a certain time interval, e.g. 0.05 sec, methods are needed that, on the one hand, create objects in the initial state and are called only at the beginning of the application launch, and on the other hand, a method that changes these states and is called periodically according to the defined time interval (0.05 sec in the example).The settings and setup methods are among the first to define the initial state and are called only once, while the draw method is called every dt seconds.This method takes care of the necessary changes to the state of objects or variables, and also of drawing these objects to the screen.
the example in the pictures shows the movement of the balls, randomly determined and it can be seen that the methods mentioned here are used for the following:
- settings: Sets the display size to full screen
- setup: Creates a random array of balls
- draw: Balls are moved and drawn
Program in PDE environment
This same example in use in a PDE environment would place inside a new scatch. When a new scatch is opened, we will rename it to e.g. BouncesGame (see image). The example shows how to simulate the chaotic movement of balls in processing.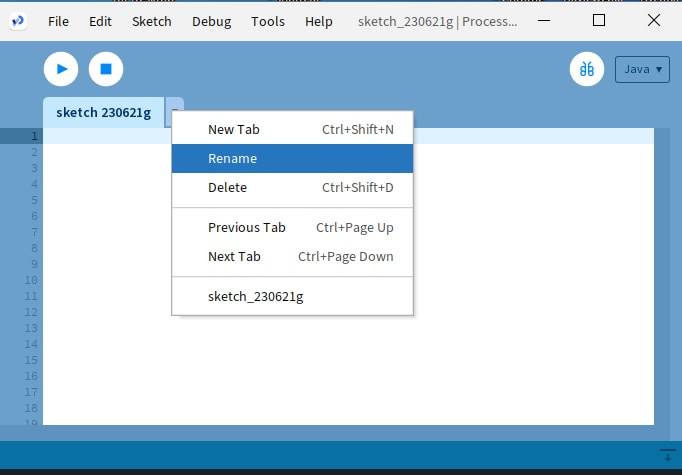
Figure 5: Creating a new sketch in processing
Here you need to type the code belonging to the main class, which will be called "BouncesGame" and after starting, a folder with the same name will be created:
Figure 6: Initial folder of the processing project
The initial class is slightly different from the initial class developed in the Eclipse IDE environment: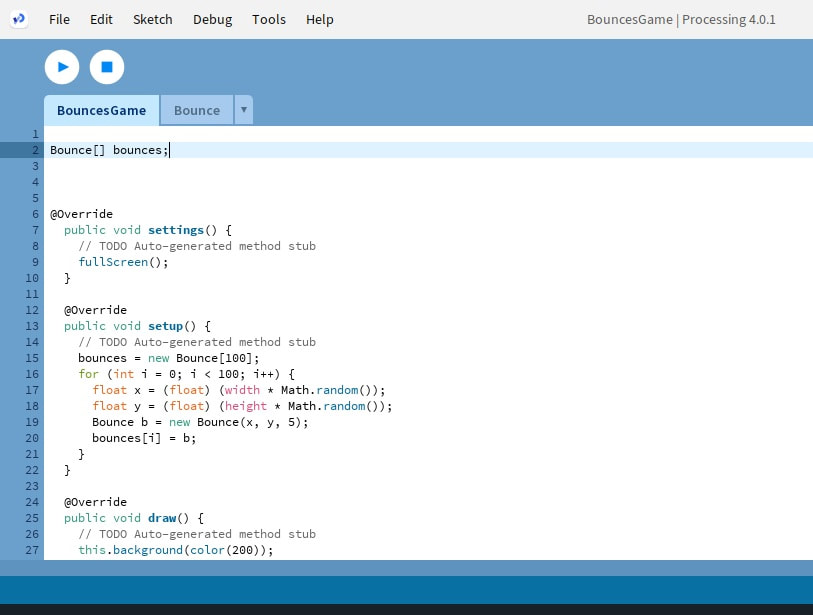
Figure 7: Initial file in processing-BouncesGame
Ovde sada nema naslova klase, importa osnovne biblioteke, već postoji deklaracija promenljivih i metode settings, setup i draw isto kao i u Eclipse varijanti.Druga klasa koja opisuje lopticu(Bounce) se neće razlikovati od pisanja u Eclipse IDE okruženju što se može vidti na sledećoj slici:

Figure 7: Example in Processing: BouncesGame - Bounce class
After starting, you will see the chaotic movement of the balls on the screen:
Figure 8: Example in Processing: BouncesGame - program execution
| Previous |< Applications in JAVA-examples |
Next Basics of processing using Java >| |