
Arduino: piezo buzzer and RGB LED
So far the Arduino has only turned LEDs on and off. In this lesson it gets a voice – a piezo buzzer that plays tones and melodies – and colors – an RGB LED that can show almost any color by mixing red, green and blue light. At the end we combine everything into a small alarm.
The piezo buzzer
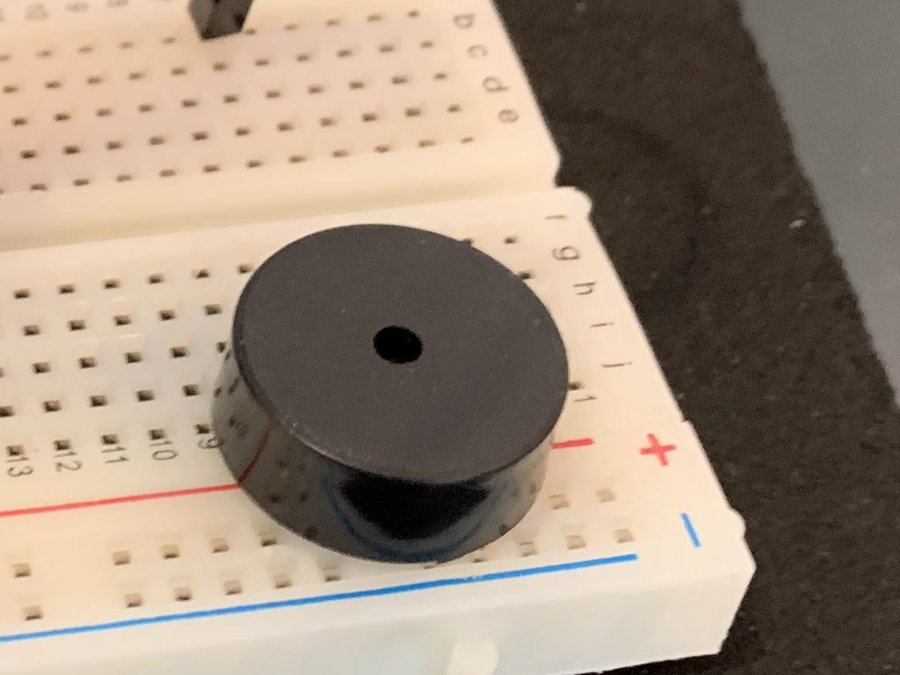
Inside a piezo buzzer there is a thin plate that bends when voltage is applied. If we switch the voltage on and off hundreds of times per second, the plate vibrates and we hear a tone. The faster the vibration, the higher the tone.
| Active buzzer | Passive buzzer | |
|---|---|---|
| how to make a sound | digitalWrite(pin, HIGH) | tone(pin, frequency) |
| pitch | always the same | we choose it |
| melody | not possible | possible |
| how to tell | beeps when connected to 5 V | only "clicks" on 5 V |
Wiring: the leg marked + (usually the longer one) goes to pin 8, the other one to GND. If it is too loud, put a 100 Ω resistor between the pin and the buzzer.
Program 1: tone() and noTone()
// Arduino – passive piezo buzzer on pin 8: a short beep every second
const int BUZZER = 8;

void setup() {
  pinMode(BUZZER, OUTPUT);
}

void loop() {
  tone(BUZZER, 1000);          // 1000 Hz tone
  delay(200);
  noTone(BUZZER);              // silence
  delay(800);
}
| Command | What it does |
|---|---|
tone(8, 1000) | plays a 1000 Hz tone on pin 8 until we stop it |
tone(8, 1000, 200) | plays the tone for 200 ms and stops by itself (the program does not wait!) |
noTone(8) | stops the tone |
Frequency is measured in hertz (Hz) – how many times per second the plate vibrates. People hear roughly from 20 Hz to 20,000 Hz, and a small piezo buzzer is loudest between 2000 and 4000 Hz.
Program 2: siren
// Arduino – siren: the pitch rises and falls
const int BUZZER = 8;

void setup() {
}

void loop() {
  for (int f = 400; f <= 1200; f += 10) {   // from 400 Hz to 1200 Hz
    tone(BUZZER, f);
    delay(5);
  }
  for (int f = 1200; f >= 400; f -= 10) {   // and back
    tone(BUZZER, f);
    delay(5);
  }
}
The for loop raises the frequency in steps of 10 Hz and then lowers it. Try changing the step or the pause – the siren will sound different.
Program 3: melody
A melody is a series of tones with a certain pitch and length. We keep the pitches in one array and the lengths in another. This is the beginning of the "Ode to Joy" – a composition from 1824:
| Note | C (C4) | D (D4) | E (E4) | F (F4) | G (G4) | A (A4) |
|---|---|---|---|---|---|---|
| Frequency (Hz) | 262 | 294 | 330 | 349 | 392 | 440 |
// Arduino – melody: the beginning of the "Ode to Joy" (L. van Beethoven, 1824)
const int BUZZER = 8;

// note frequencies (Hz) in the fourth octave
const int C4 = 262, D4 = 294, E4 = 330, F4 = 349, G4 = 392;

int notes[]    = { E4, E4, F4, G4, G4, F4, E4, D4, C4, C4, D4, E4, E4, D4, D4 };
int durations[] = { 4,  4,  4,  4,  4,  4,  4,  4,  4,  4,  4,  4,  3,  8,  2 };
// 4 = quarter, 8 = eighth, 2 = half, 3 = dotted quarter (approximately)

const int NUM_NOTES = sizeof(notes) / sizeof(notes[0]);

void setup() {
  for (int i = 0; i < NUM_NOTES; i++) {
    int ms = 1600 / durations[i];          // a quarter note lasts 400 ms
    tone(BUZZER, notes[i], ms);
    delay(ms * 1.3);                      // short pause between notes
  }
  noTone(BUZZER);
}

void loop() {
}
The expression sizeof(notes) / sizeof(notes[0]) calculates how many elements the array has, so we do not have to count them ourselves. The melody is in setup(), so it plays only once – press RESET to hear it again.
The RGB LED
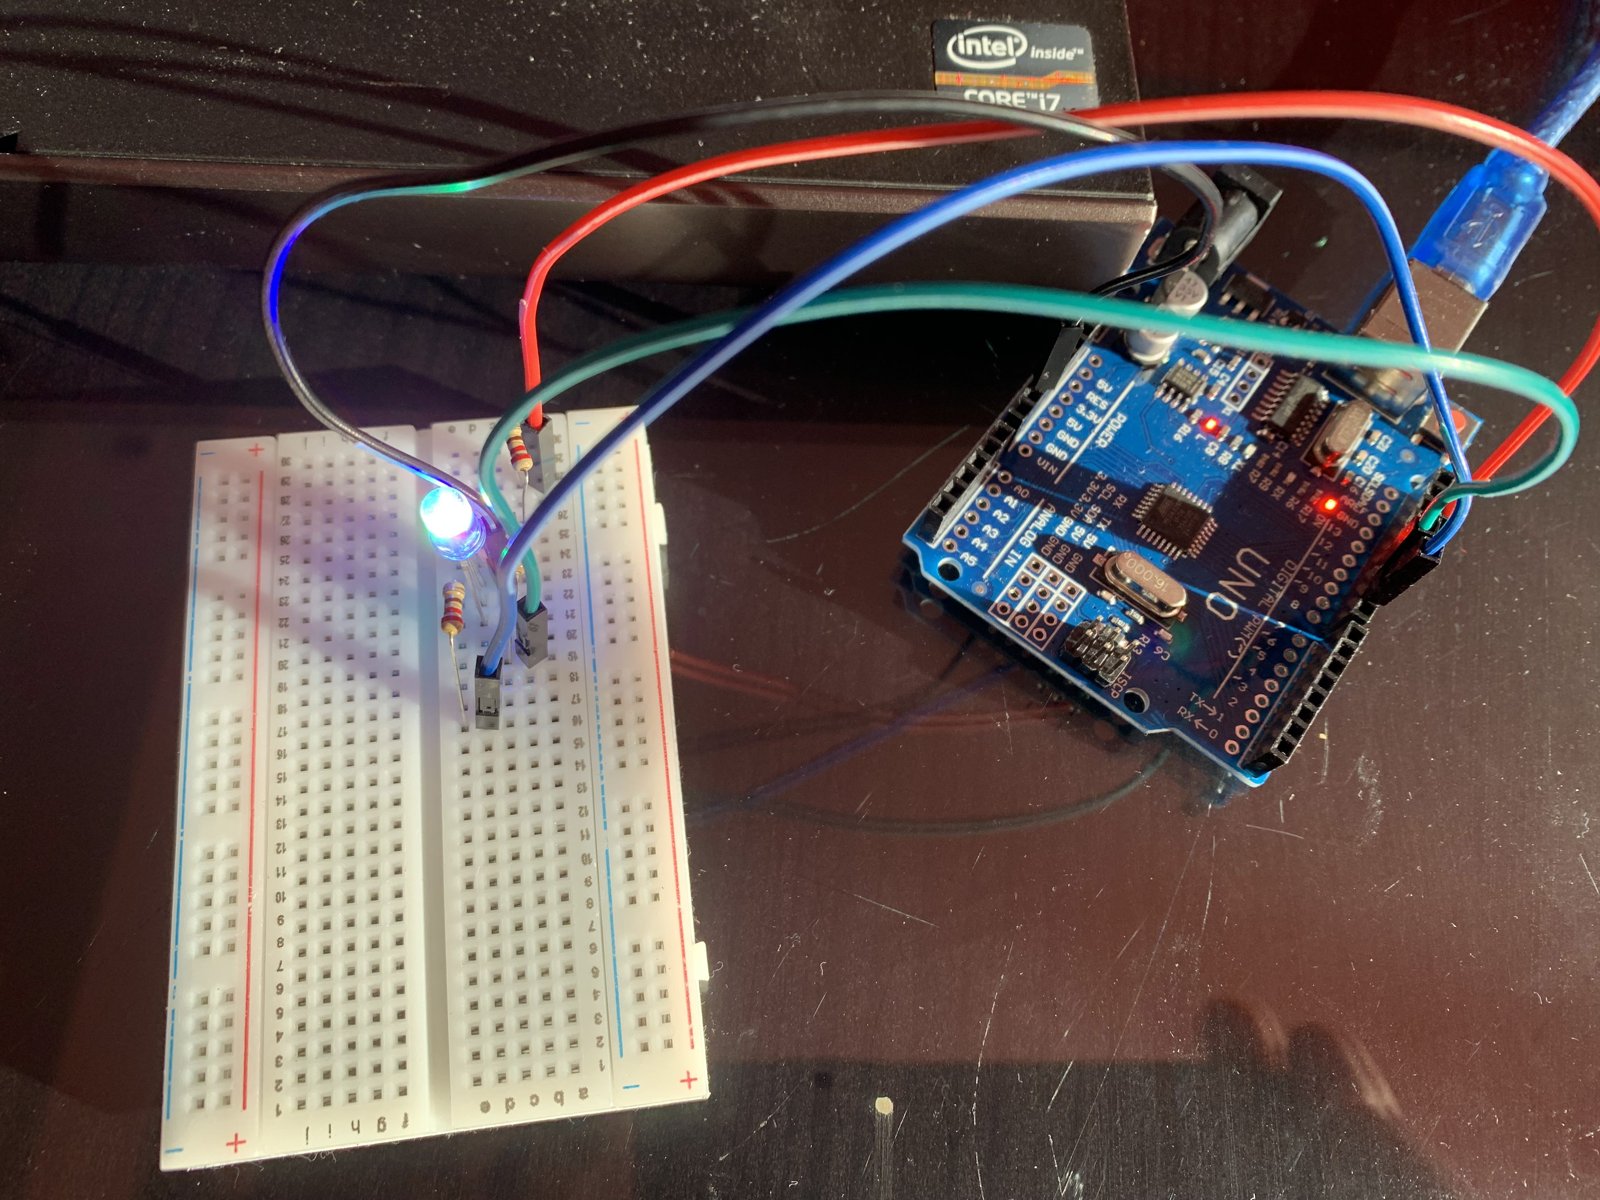
An RGB LED has three LEDs in one package: red (R), green (G) and blue (B). It has four legs – the longest one is common. On a common cathode LED the longest leg goes to GND; on a common anode LED it goes to 5V.
| Leg | Connects to |
|---|---|
| R (red) | pin 9 through a 220 Ω resistor |
| longest (common cathode) | GND |
| G (green) | pin 10 through a 220 Ω resistor |
| B (blue) | pin 6 through a 220 Ω resistor |
tone() uses the same internal timer as PWM on pins 3 and 11. While the buzzer is playing, brightness control on those pins would not work. Pins 9, 10 and 6 do not have this problem.Program 4: mixing colors
We change the brightness of each color with analogWrite(pin, 0–255) (PWM). By mixing the three primary colors of light we get the others:
// Arduino – RGB LED (common cathode to GND): basic colors
const int R = 9;                // red leg through a 220 ohm resistor
const int G = 10;               // green
const int B = 6;                // blue (all three pins have PWM ~)

// color(r, g, b): each number from 0 (off) to 255 (brightest)
void color(int r, int g, int b) {
  analogWrite(R, r);
  analogWrite(G, g);
  analogWrite(B, b);
}

void setup() {
  pinMode(R, OUTPUT);
  pinMode(G, OUTPUT);
  pinMode(B, OUTPUT);
}

void loop() {
  color(255, 0, 0);     delay(1000);   // red
  color(0, 255, 0);     delay(1000);   // green
  color(0, 0, 255);     delay(1000);   // blue
  color(255, 255, 0);   delay(1000);   // yellow = red + green
  color(0, 255, 255);   delay(1000);   // cyan = green + blue
  color(255, 0, 255);   delay(1000);   // magenta = red + blue
  color(255, 255, 255); delay(1000);   // white = all three
  color(0, 0, 0);       delay(1000);   // off
}
| R | G | B | Color |
|---|---|---|---|
| 255 | 0 | 0 | red |
| 255 | 255 | 0 | yellow |
| 0 | 255 | 255 | cyan |
| 255 | 0 | 255 | magenta |
| 255 | 100 | 0 | orange |
| 255 | 255 | 255 | white |
analogWrite(R, 255 - r); in the color() function, and the same for G and B.Program 5: rainbow
// Arduino – RGB LED: colors slowly blend (rainbow)
const int R = 9;
const int G = 10;
const int B = 6;

void color(int r, int g, int b) {
  analogWrite(R, r);
  analogWrite(G, g);
  analogWrite(B, b);
}

void setup() {
}

void loop() {
  for (int i = 0; i <= 255; i++) { color(255 - i, i, 0); delay(8); }   // red->green
  for (int i = 0; i <= 255; i++) { color(0, 255 - i, i); delay(8); }   // green->blue
  for (int i = 0; i <= 255; i++) { color(i, 0, 255 - i); delay(8); }   // blue->red
}
While one color fades, another grows stronger – that is why the colors blend smoothly. A full cycle takes about 6 seconds (3 × 256 steps of 8 ms).
All together: alarm
We combine everything from this and the previous lesson: a button on pin 2 turns the alarm on and off, the RGB LED flashes red and blue, and the buzzer plays two alternating tones.
// Arduino – button, RGB LED and buzzer together: an "alarm"
// Pressing the button turns the alarm on and off.
// While the alarm is on, the LED flashes red-blue and a siren sounds.
const int R = 9, G = 10, B = 6;
const int BUZZER = 8;
const int BUTTON = 2;

bool alarm = false;
int previous = HIGH;

void color(int r, int g, int b) {
  analogWrite(R, r);
  analogWrite(G, g);
  analogWrite(B, b);
}

void setup() {
  pinMode(BUTTON, INPUT_PULLUP);
  color(0, 40, 0);                         // dim green: everything is fine
}

void loop() {
  int now = digitalRead(BUTTON);
  if (previous == HIGH && now == LOW) {
    alarm = !alarm;
    if (!alarm) {
      noTone(BUZZER);
      color(0, 40, 0);
    }
    delay(30);
  }
  previous = now;

  if (alarm) {
    color(255, 0, 0);
    tone(BUZZER, 880);
    delay(250);
    color(0, 0, 255);
    tone(BUZZER, 660);
    delay(250);
  }
}
Practice tasks
Try to solve each task yourself first, then open the solution.
- Build a three-button piano (pins 2, 3 and 4): while a button is pressed, the note C, E or G plays.
- Each press of the button on pin 2 changes the color of the RGB LED, going through seven colors.
- Build an RGB thermometer: a potentiometer on A0 "plays" a temperature from 0 to 40 °C. Below 18 °C the LED is blue, from 18 to 25 °C green, above 25 °C red. Above 35 °C a short beep also sounds.
Solution 1: three-button piano
// Task – "piano" with three buttons (pins 2, 3, 4): each button plays its own note
const int BUZZER = 8;
const int BUTTONS[3] = { 2, 3, 4 };
const int TONES[3] = { 262, 330, 392 };   // C, E, G

void setup() {
  for (int i = 0; i < 3; i++) {
    pinMode(BUTTONS[i], INPUT_PULLUP);
  }
}

void loop() {
  int playing = -1;
  for (int i = 0; i < 3; i++) {
    if (digitalRead(BUTTONS[i]) == LOW) {
      playing = i;
    }
  }
  if (playing >= 0) {
    tone(BUZZER, TONES[playing]);
  } else {
    noTone(BUZZER);
  }
}
Solution 2: color on a button
// Task – each button press changes the RGB LED color (7 colors in a loop)
const int R = 9, G = 10, B = 6;
const int BUTTON = 2;

const int COLORS[7][3] = {
  {255, 0, 0}, {0, 255, 0}, {0, 0, 255}, {255, 255, 0},
  {0, 255, 255}, {255, 0, 255}, {255, 255, 255}
};
int k = 0;
int previous = HIGH;

void show() {
  analogWrite(R, COLORS[k][0]);
  analogWrite(G, COLORS[k][1]);
  analogWrite(B, COLORS[k][2]);
}

void setup() {
  pinMode(BUTTON, INPUT_PULLUP);
  show();
}

void loop() {
  int now = digitalRead(BUTTON);
  if (previous == HIGH && now == LOW) {
    k = (k + 1) % 7;
    show();
    delay(30);
  }
  previous = now;
}
Solution 3: RGB thermometer
// Task – RGB "thermometer": a potentiometer on A0 plays the temperature (0–40 °C)
// below 18 °C blue, 18 to 25 °C green, above 25 °C red; above 35 °C also a beep
const int R = 9, G = 10, B = 6;
const int BUZZER = 8;

void color(int r, int g, int b) {
  analogWrite(R, r);
  analogWrite(G, g);
  analogWrite(B, b);
}

void setup() {
  Serial.begin(9600);
}

void loop() {
  int t = map(analogRead(A0), 0, 1023, 0, 40);
  Serial.println(t);
  if (t < 18) {
    color(0, 0, 255);
  } else if (t <= 25) {
    color(0, 255, 0);
  } else {
    color(255, 0, 0);
  }
  if (t > 35) {
    tone(BUZZER, 1500, 100);
  }
  delay(300);
}
Check your knowledge
Open the quiz
Quiz: buzzer and RGB LED
1. What does tone(8, 440) do?
2. Which kind of buzzer can play a melody?
3. Which color does color(255, 255, 0) give on a common cathode RGB LED?
4. Why is the blue leg of the RGB LED on pin 6 and not on pin 11?