
ESP32: air temperature and humidity (DHT11) and a weather station
The DHT11 sensor measures temperature and air humidity – we used it in the Arduino lesson temperature sensor. The ESP32 has built-in Wi-Fi, so we can also see the same data on a mobile phone: we will build a small weather station with a web page.
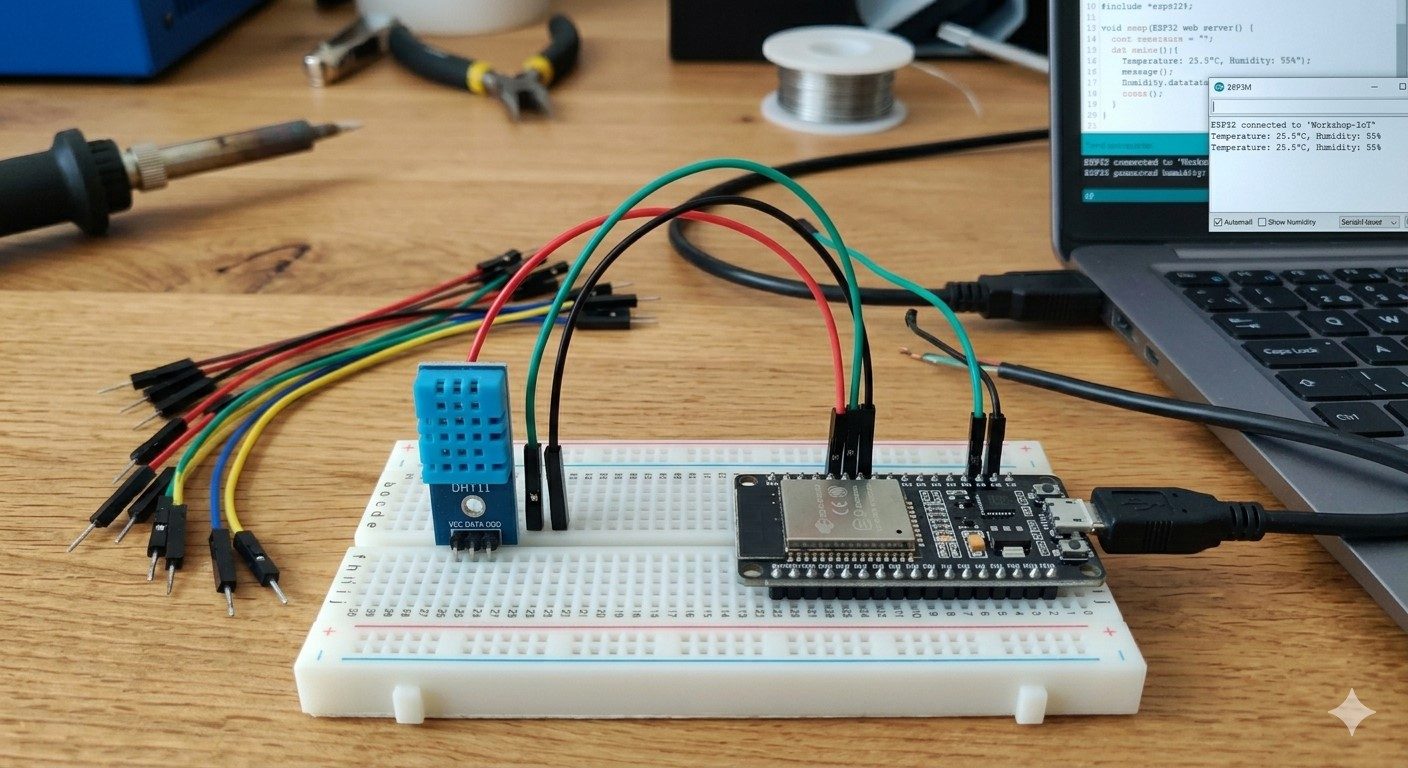
The DHT11 sensor
| DHT11 | DHT22 | |
|---|---|---|
| temperature | 0 to 50 °C, ±2 °C | −40 to 80 °C, ±0.5 °C |
| humidity | 20 to 90 %, ±5 % | 0 to 100 %, ±2 % |
| max. readings | 1 per second | 1 every 2 seconds |
| power | 3.3–5 V | 3.3–5 V |
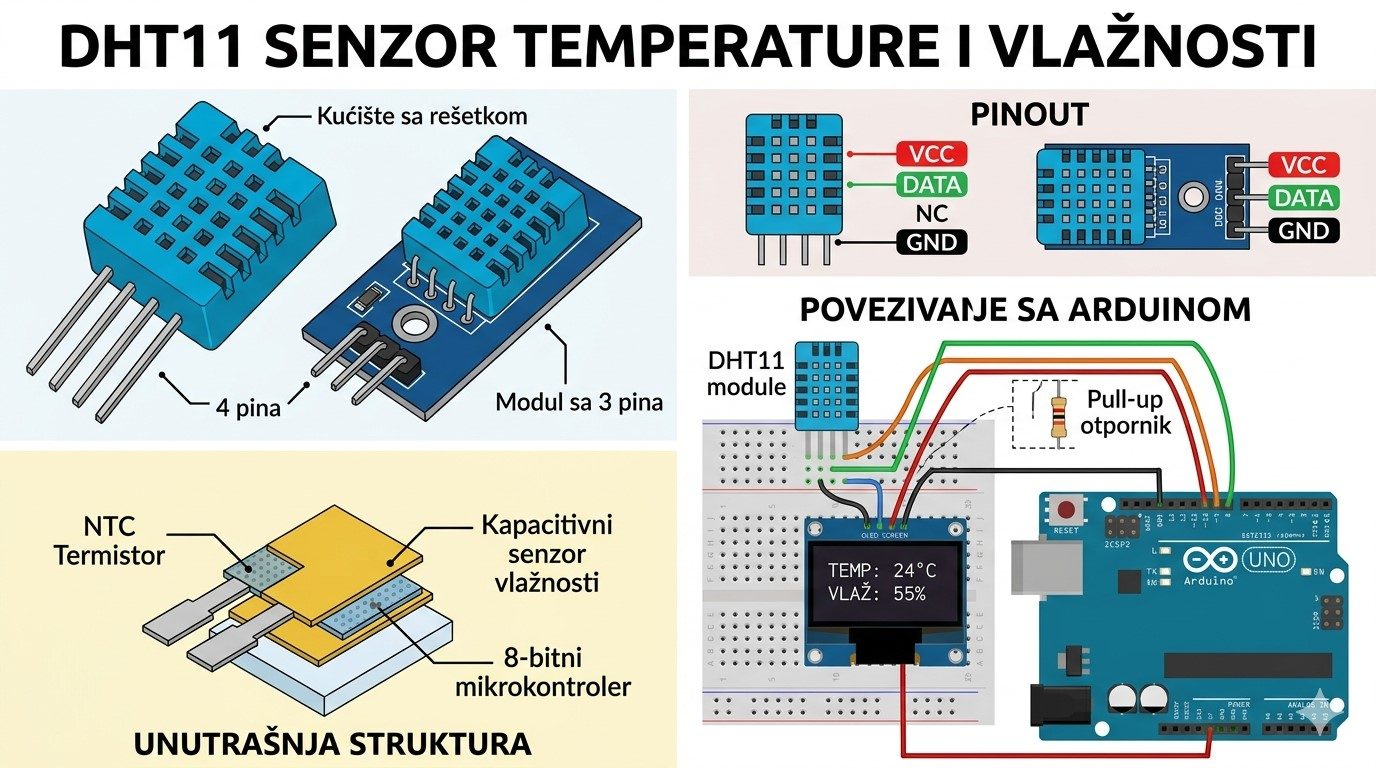
The sensor has three (module) or four (bare sensor) pins. Data is sent over one wire (DATA) as a series of pulses – that is why we need a library that understands them.
Wiring
| DHT11 module | ESP32 |
|---|---|
| VCC (+) | 3V3 |
| DATA (OUT, S) | GPIO4 |
| GND (−) | GND |
- The module board already has a 10 kΩ resistor between DATA and VCC. If you use the bare 4-pin sensor, add this resistor yourself.
- On the ESP32 we power the sensor from 3.3 V – then the DATA signal is also 3.3 V, safe for the pin.
Step 1: readings in the Serial Monitor
Install the DHT sensor library and Adafruit Unified Sensor libraries (Library Manager). The program is the same as for the Arduino – only the pin number and the serial speed change:
// ESP32 – air temperature and humidity with the DHT11 sensor
// Library: "DHT sensor library" (Adafruit) + "Adafruit Unified Sensor"
#include <DHT.h>

const int DHT_PIN = 4;          // sensor DATA pin
DHT dht(DHT_PIN, DHT11);        // for a DHT22 write DHT22

void setup() {
  Serial.begin(115200);
  dht.begin();
}

void loop() {
  delay(2000);                  // DHT11: at most one reading per second

  float humidity = dht.readHumidity();
  float temperature = dht.readTemperature();   // in °C

  // if reading fails, the library returns NaN ("not a number")
  if (isnan(humidity) || isnan(temperature)) {
    Serial.println("Error reading the DHT sensor!");
    return;
  }

  float feelsLike = dht.computeHeatIndex(temperature, humidity, false);  // heat index (how hot it feels)

  Serial.print("Temperature: ");
  Serial.print(temperature, 1);
  Serial.print(" C   Humidity: ");
  Serial.print(humidity, 0);
  Serial.print(" %   Feels like: ");
  Serial.print(feelsLike, 1);
  Serial.println(" C");
}
isnan()checks whether the reading succeeded. If you keep getting an error, check the DATA wire and the pin number.- The heat index tells how warm it feels when humidity is taken into account: at 30 °C and 80 % humidity it feels like almost 38 °C.
Step 2: weather station with a web page
The ESP32 connects to your home Wi-Fi network and becomes a small web server. When you open its address in a browser on a phone (in the same network), you get a page with the temperature and humidity.
// ESP32 – weather station: DHT11 + web page over Wi-Fi
#include <WiFi.h>
#include <WebServer.h>
#include <DHT.h>
const char* SSID = "NETWORK_NAME"; // enter the name of your Wi-Fi network
const char* PASSWORD = "PASSWORD"; // and the password
const int DHT_PIN = 4;
DHT dht(DHT_PIN, DHT11);
WebServer server(80);
float temperature = 0;
float humidity = 0;
unsigned long lastReading = 0;
void measure() {
float t = dht.readTemperature();
float h = dht.readHumidity();
if (!isnan(t) && !isnan(h)) { // keep only valid readings
temperature = t;
humidity = h;
}
}
void homePage() {
String s = "<!DOCTYPE html><html><head><meta charset='utf-8'>";
s += "<meta name='viewport' content='width=device-width'>";
s += "<meta http-equiv='refresh' content='5'>"; // refresh every 5 s
s += "<title>Weather station</title></head><body style='font-family:sans-serif'>";
s += "<h1>ESP32 weather station</h1>";
s += "<p>Temperature: <b>" + String(temperature, 1) + " °C</b></p>";
s += "<p>Air humidity: <b>" + String(humidity, 0) + " %</b></p>";
s += "</body></html>";
server.send(200, "text/html", s);
}
void setup() {
Serial.begin(115200);
dht.begin();
WiFi.begin(SSID, PASSWORD);
Serial.print("Connecting");
while (WiFi.status() != WL_CONNECTED) {
delay(500);
Serial.print(".");
}
Serial.println();
Serial.print("Open in a browser: http://");
Serial.println(WiFi.localIP()); // the ESP32 address in your network
server.on("/", homePage);
server.begin();
}
void loop() {
server.handleClient(); // answers the browser
if (millis() - lastReading >= 2000) { // measure every 2 s, without delay()
lastReading = millis();
measure();
}
}
- Enter the name and password of your network, upload the program and open the Serial Monitor.
- When the message "Open in a browser: http://192.168…" appears, open that address on a phone or computer.
- The page refreshes itself every 5 seconds (the line with
refresh).
delay(2000) in loop()? The server must answer the browser all the time. So we measure time with millis() (how many milliseconds have passed since power-on) and read the sensor when 2 s have passed, while handleClient() answers requests in between. Automatic garden watering uses the same approach.Practice tasks
- Also print the temperature in Fahrenheit (
dht.readTemperature(true)). - Turn on the LED on GPIO2 when the temperature goes above 26 °C.
- Show the highest and the lowest temperature since power-on on the web page.
- Mark the humidity with a color on the web page: below 30 % – "dry" (orange), above 70 % – "humid" (blue).
Solution: LED turns on when it is too warm
// Task – warning: the LED turns on when the temperature goes over the limit
#include <DHT.h>

const int DHT_PIN = 4;
const int LED_PIN = 2;
const float LIMIT = 26.0;     // °C

DHT dht(DHT_PIN, DHT11);

void setup() {
  Serial.begin(115200);
  pinMode(LED_PIN, OUTPUT);
  dht.begin();
}

void loop() {
  delay(2000);
  float t = dht.readTemperature();
  if (isnan(t)) {
    return;                     // skip a failed reading
  }
  Serial.println(t);
  if (t > LIMIT) {
    digitalWrite(LED_PIN, HIGH);   // too warm
  } else {
    digitalWrite(LED_PIN, LOW);
  }
}
Check your knowledge
Open the quiz
Quiz: DHT11 and a weather station
1. What does the DHT11 sensor measure?
2. How often can the DHT11 measure at most?
3. What does it mean when readTemperature() returns NaN?
4. Why does the weather station use millis() instead of delay(2000)?