
Final project: smart classroom with the ESP32
This project combines almost everything we have learned: the ESP32 measures temperature and humidity with a DHT11 sensor, an LED ring shows with its color whether the classroom is cold, comfortable or warm, a servo motor opens a "window" when it is too warm, and everything can be monitored and controlled from a web page on a phone. At the end you can also add an OLED display.
What we revise
Before you start, revise the lessons where each part is explained on its own:
- Temperature and humidity – DHT11 (ESP32) – readings and a weather station with a web page
- LED ring (ESP32) – the Adafruit NeoPixel library and colors
- SG90 servo exercise (ESP32) – the ESP32Servo library and powering the servo
- OLED display – for the upgrade at the end
How the classroom works
| Temperature | LED ring | Window (servo) |
|---|---|---|
| below 20 °C | blue – cold | closed (0°) |
| 20 to 26 °C | green – comfortable | closed (0°) |
| above 26 °C | red – warm | open (90°) |
This is automatic mode. On the web page you can also choose manual mode: then the user opens and closes the window and chooses the light (white, warm yellow or off).
Parts and wiring
| Part | Part pin | ESP32 |
|---|---|---|
| DHT11 | VCC / GND / DATA | 3V3 / GND / GPIO4 |
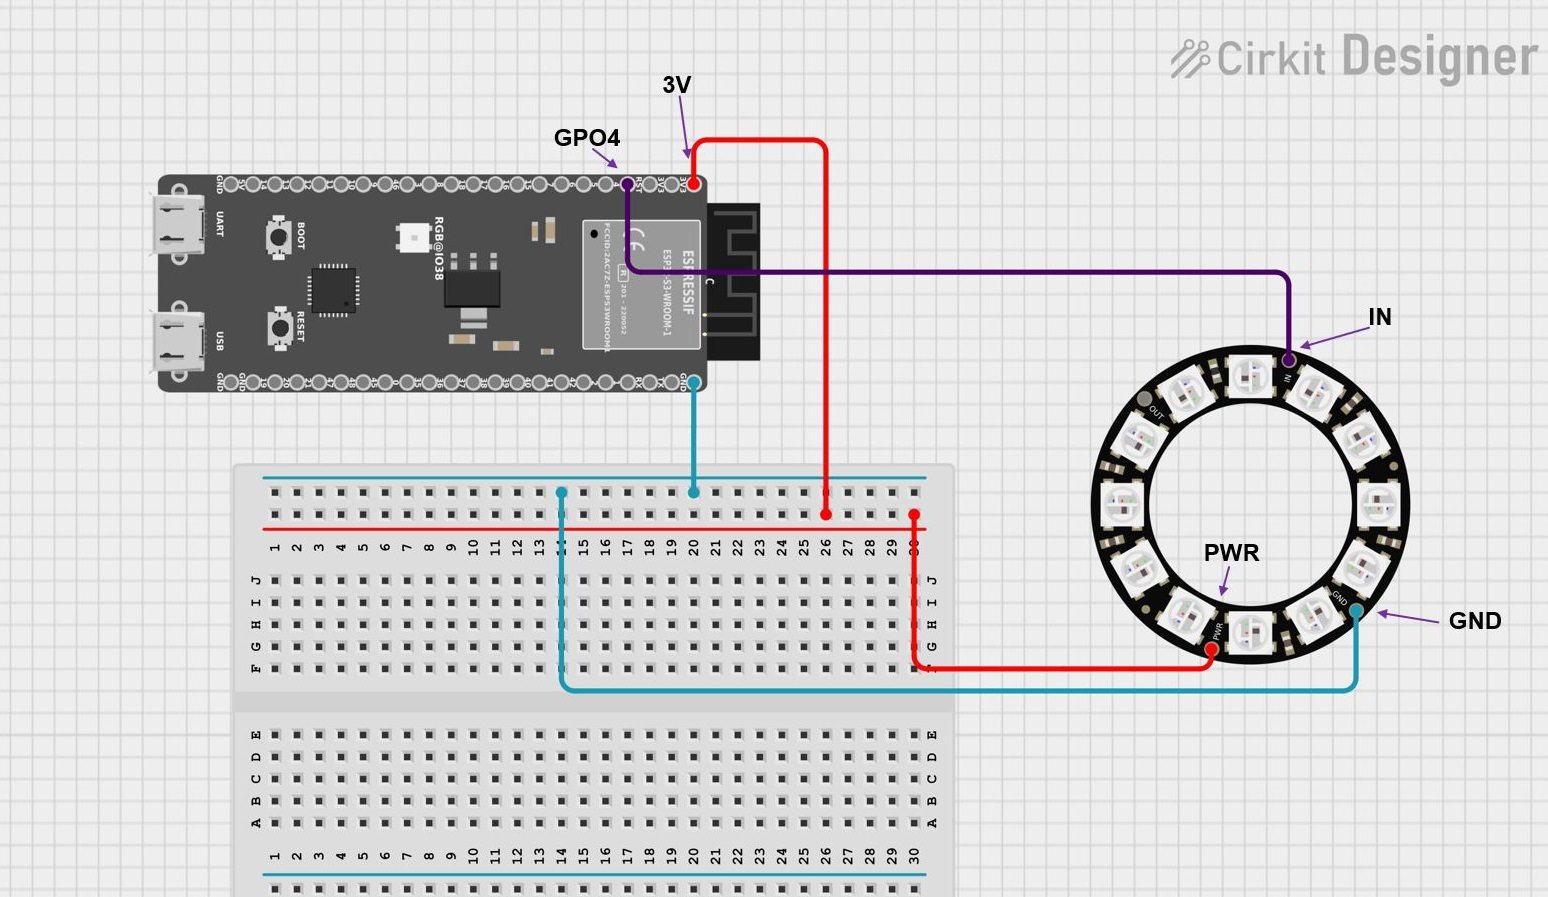
| LED ring (12 LEDs) | PWR / GND / IN (DIN) | VIN (5 V) / GND / GPIO27 |
| SG90 servo | red / brown / orange | VIN (5 V) / GND / GPIO13 |
| OLED display (upgrade) | VCC / GND / SDA / SCL | 3V3 / GND / GPIO21 / GPIO22 |
Power: the servo and the ring together can briefly draw more current than a computer USB port gives. If the ESP32 resets when the servo starts, power the servo and the ring from a separate 5 V supply (e.g. a phone charger) and connect all GND wires together. Keep the ring at low brightness (
setBrightness(40)).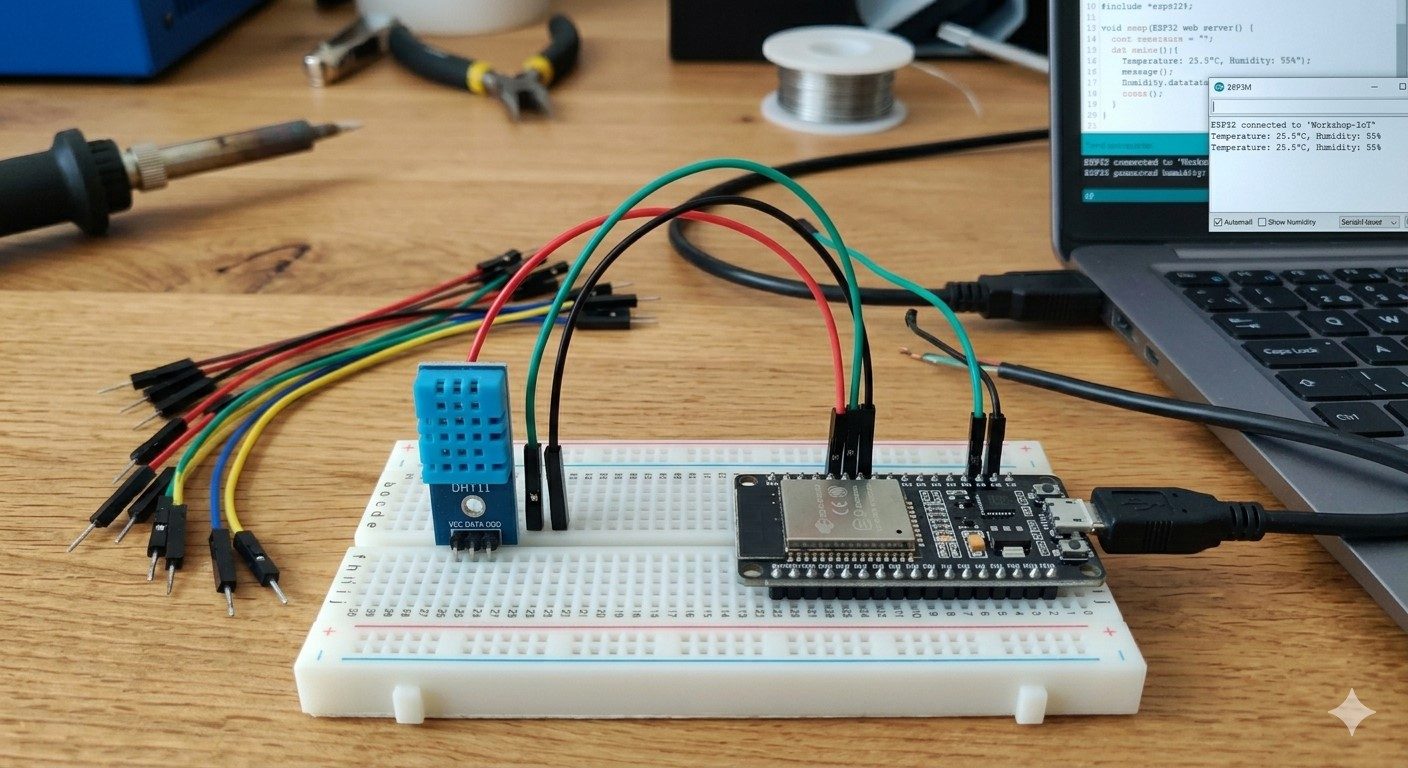
Step 1: testing the parts
A good habit in every project: before the main program, test each part separately. This program colors the ring blue, moves the servo and prints the readings in the Serial Monitor (115200). If something does not work, now it is easy to find which part.
// Smart classroom – step 1: test all parts at once
// DHT11 -> GPIO4, LED ring (DIN) -> GPIO27, servo (signal) -> GPIO13
#include <DHT.h>
#include <Adafruit_NeoPixel.h>
#include <ESP32Servo.h>

const int DHT_PIN = 4;
const int RING_PIN = 27;
const int SERVO_PIN = 13;
const int NUM_LEDS = 12;

DHT dht(DHT_PIN, DHT11);
Adafruit_NeoPixel ring(NUM_LEDS, RING_PIN, NEO_GRB + NEO_KHZ800);
Servo windowServo;

void setup() {
  Serial.begin(115200);
  dht.begin();
  ring.begin();
  ring.setBrightness(40);
  windowServo.setPeriodHertz(50);
  windowServo.attach(SERVO_PIN, 500, 2400);

  ring.fill(ring.Color(0, 0, 255));   // ring: blue
  ring.show();
  windowServo.write(0);                        // window: closed
  delay(1000);
  windowServo.write(90);                       // window: open
  delay(1000);
  windowServo.write(0);
}

void loop() {
  delay(2000);
  float t = dht.readTemperature();
  float h = dht.readHumidity();
  if (isnan(t) || isnan(h)) {
    Serial.println("DHT11: error");
  } else {
    Serial.print("DHT11: ");
    Serial.print(t, 1);
    Serial.print(" C, ");
    Serial.print(h, 0);
    Serial.println(" %");
  }
}
Step 2: automatic mode
Now the temperature decides the ring color and the window position, as in the table at the start. The limits are written as the constants COLD and WARM, so they are easy to change. To test, warm the sensor with your palm or breath.
// Smart classroom – step 2: automatic mode (no web page)
// the temperature sets the ring color and whether the window is open
#include <DHT.h>
#include <Adafruit_NeoPixel.h>
#include <ESP32Servo.h>

const int DHT_PIN = 4;
const int RING_PIN = 27;
const int SERVO_PIN = 13;
const int NUM_LEDS = 12;

const float COLD = 20.0;      // below this: blue
const float WARM = 26.0;       // above this: red and the window opens

const int CLOSED = 0;         // servo angles
const int OPEN = 90;

DHT dht(DHT_PIN, DHT11);
Adafruit_NeoPixel ring(NUM_LEDS, RING_PIN, NEO_GRB + NEO_KHZ800);
Servo windowServo;

void light(int r, int g, int b) {
  ring.fill(ring.Color(r, g, b));
  ring.show();
}

void setup() {
  Serial.begin(115200);
  dht.begin();
  ring.begin();
  ring.setBrightness(40);
  windowServo.setPeriodHertz(50);
  windowServo.attach(SERVO_PIN, 500, 2400);
  windowServo.write(CLOSED);
}

void loop() {
  delay(2000);
  float t = dht.readTemperature();
  if (isnan(t)) {
    return;                     // skip a failed reading
  }
  Serial.println(t);

  if (t < COLD) {
    light(0, 0, 255);          // cold
  } else if (t <= WARM) {
    light(0, 255, 0);          // comfortable
  } else {
    light(255, 0, 0);          // warm
  }

  if (t > WARM) {
    windowServo.write(OPEN);
  } else {
    windowServo.write(CLOSED);
  }
}
Step 3: web page
The final program combines step 2 with the web server from the weather station. Enter the name and password of your Wi-Fi network, upload the program and read the address in the Serial Monitor (e.g. http://192.168.1.45). Open it on a phone in the same network.
// Smart classroom – final program:
// DHT11, LED ring, servo ("window") and web page
// Libraries: DHT sensor library, Adafruit NeoPixel, ESP32Servo (Library Manager)
#include <WiFi.h>
#include <WebServer.h>
#include <DHT.h>
#include <Adafruit_NeoPixel.h>
#include <ESP32Servo.h>
const char* SSID = "NETWORK_NAME"; // enter the Wi-Fi network name
const char* PASSWORD = "PASSWORD"; // and the password
// ---- pins ----
const int DHT_PIN = 4;
const int RING_PIN = 27;
const int SERVO_PIN = 13;
const int NUM_LEDS = 12;
// ---- settings ----
const float COLD = 20.0;
const float WARM = 26.0;
const int CLOSED = 0;
const int OPEN = 90;
DHT dht(DHT_PIN, DHT11);
Adafruit_NeoPixel ring(NUM_LEDS, RING_PIN, NEO_GRB + NEO_KHZ800);
Servo windowServo;
WebServer server(80);
// ---- classroom state ----
float temperature = 0;
float humidity = 0;
bool automatic = true; // true: the temperature decides, false: the user decides
bool windowOpen = false;
String manualLight = "off"; // color in manual mode
unsigned long lastReading = 0;
void setLight(int r, int g, int b) {
ring.fill(ring.Color(r, g, b));
ring.show();
}
// applies the state to the ring and the servo
void apply() {
if (automatic) {
if (temperature < COLD) setLight(0, 0, 255);
else if (temperature <= WARM) setLight(0, 255, 0);
else setLight(255, 0, 0);
windowOpen = temperature > WARM;
} else {
if (manualLight == "white") setLight(255, 255, 255);
else if (manualLight == "warm") setLight(255, 150, 0);
else setLight(0, 0, 0);
}
windowServo.write(windowOpen ? OPEN : CLOSED);
}
void measure() {
float t = dht.readTemperature();
float h = dht.readHumidity();
if (!isnan(t) && !isnan(h)) {
temperature = t;
humidity = h;
}
}
// a button on the web page is a plain link with a parameter in the address
String button(const char* address, const char* text) {
return String("<a class='d' href='") + address + "'>" + text + "</a> ";
}
void homePage() {
String s = "<!DOCTYPE html><html><head><meta charset='utf-8'>";
s += "<meta name='viewport' content='width=device-width'>";
s += "<meta http-equiv='refresh' content='10'>";
s += "<title>Smart classroom</title>";
s += "<style>body{font-family:sans-serif;margin:16px}";
s += ".d{display:inline-block;padding:10px 14px;margin:4px;background:#1e6fd9;";
s += "color:#fff;border-radius:8px;text-decoration:none}</style>";
s += "</head><body><h1>Smart classroom</h1>";
s += "<p>Temperature: <b>" + String(temperature, 1) + " °C</b><br>";
s += "Humidity: <b>" + String(humidity, 0) + " %</b><br>";
s += "Window: <b>" + String(windowOpen ? "open" : "closed") + "</b><br>";
s += "Mode: <b>" + String(automatic ? "automatic" : "manual") + "</b></p>";
s += "<h2>Mode</h2>";
s += button("/mode?m=auto", "Automatic") + button("/mode?m=manual", "Manual");
if (!automatic) {
s += "<h2>Window</h2>";
s += button("/window?w=open", "Open") + button("/window?w=close", "Close");
s += "<h2>Light</h2>";
s += button("/light?c=white", "White") + button("/light?c=warm", "Warm yellow");
s += button("/light?c=off", "Off");
}
s += "</body></html>";
server.send(200, "text/html", s);
}
// after a command, send the browser back to the home page
void backToHome() {
apply();
server.sendHeader("Location", "/");
server.send(303, "text/plain", "");
}
void modeCommand() {
automatic = server.arg("m") == "auto";
backToHome();
}
void windowCommand() {
if (!automatic) windowOpen = server.arg("w") == "open";
backToHome();
}
void lightCommand() {
if (!automatic) manualLight = server.arg("c");
backToHome();
}
void setup() {
Serial.begin(115200);
dht.begin();
ring.begin();
ring.setBrightness(40);
windowServo.setPeriodHertz(50);
windowServo.attach(SERVO_PIN, 500, 2400);
windowServo.write(CLOSED);
WiFi.begin(SSID, PASSWORD);
Serial.print("Connecting");
while (WiFi.status() != WL_CONNECTED) {
delay(500);
Serial.print(".");
}
Serial.println();
Serial.print("Open in a browser: http://");
Serial.println(WiFi.localIP());
server.on("/", homePage);
server.on("/mode", modeCommand);
server.on("/window", windowCommand);
server.on("/light", lightCommand);
server.begin();
measure();
apply();
}
void loop() {
server.handleClient();
if (millis() - lastReading >= 2000) { // measure every 2 s, without delay()
lastReading = millis();
measure();
apply();
}
}
| Address | What it does |
|---|---|
/ | home page: readings, window state and buttons |
/mode?m=auto or ?m=manual | chooses the mode |
/window?w=open or ?w=close | opens or closes the window (manual mode only) |
/light?c=white, warm, off | chooses the light (manual mode only) |
How the program works
- The variables
automatic,windowOpenandmanualLightkeep the classroom state. Theapply()function passes this state to the ring and the servo. - The buttons on the page are plain links. The part of the address after
?is a parameter – the ESP32 reads it withserver.arg("w"). - After a command, the ESP32 answers with code 303 and the address
/, so the browser goes back to the home page (and refreshing the page does not repeat the command). - Readings use
millis(), notdelay(), so the server can always answer the phone.
Upgrade: OLED display
Add the display from the lesson OLED display (SDA on GPIO21, SCL on GPIO22) so the state can be seen without a phone. This short program tests the display; then move the startDisplay() and showOnDisplay() functions into the final program.
// Upgrade – classroom state on an OLED display (SDA = GPIO21, SCL = GPIO22)
// Add these parts to the final program.

#include <Wire.h>
#include <Adafruit_GFX.h>
#include <Adafruit_SSD1306.h>

Adafruit_SSD1306 display(128, 64, &Wire, -1);

// 1) in setup(), before WiFi.begin():
void startDisplay() {
  Wire.begin(21, 22);
  display.begin(SSD1306_SWITCHCAPVCC, 0x3C);
  display.setTextColor(SSD1306_WHITE);
}

// 2) in loop(), after measure() and apply():
void showOnDisplay(float t, float h, bool open, bool automatic) {
  display.clearDisplay();
  display.setTextSize(2);
  display.setCursor(0, 0);
  display.print(t, 1);
  display.print(" C");
  display.setTextSize(1);
  display.setCursor(0, 24);
  display.print("Humidity: ");
  display.print(h, 0);
  display.print(" %");
  display.setCursor(0, 38);
  display.print(open ? "Window: open" : "Window: closed");
  display.setCursor(0, 52);
  display.print(automatic ? "Mode: auto" : "Mode: manual");
  display.display();
}

void setup() {
  startDisplay();
  showOnDisplay(22.5, 45, false, true);   // test display
}

void loop() {
}
In the final program call startDisplay() at the beginning of setup(), and showOnDisplay(temperature, humidity, windowOpen, automatic) in loop(), right after apply().
How the project is graded
If you do the project at school, the teacher can use this table (100 points in total):
| Part of the project | Points | What is checked |
|---|---|---|
| wiring | 20 | everything is connected correctly, common GND, servo and ring on 5 V |
| automatic mode | 25 | ring color and window match the temperature |
| web page | 25 | shows readings, changes the mode, window and light |
| code | 15 | constants instead of "magic numbers", comments, clear functions |
| demo and explanation | 15 | the student shows the project and explains how it works |
Grade scale: 0–49 points = 1, 50–62 = 2, 63–75 = 3, 76–88 = 4, 89–100 = 5. The scale is a suggestion; the teacher can adjust it.
Practice tasks
Try to solve each task yourself first, then open the solution.
- Add a school bell: after 45 minutes the ring blinks yellow 5 times. For testing use 45 seconds instead of 45 minutes.
- Let the window also open when the air is too humid (humidity above 70 %), not only when it is warm. Write a function
shouldOpen(t, h). - Make the window open gradually: at 26 °C it is closed (0°), at 30 °C or more fully open (90°), and in between – in proportion to the temperature.
Solution 1: school bell
// Task – "school bell": after 45 minutes the ring blinks yellow 5 times
// (here 45 s, for testing)
#include <Adafruit_NeoPixel.h>

const int RING_PIN = 27;
Adafruit_NeoPixel ring(12, RING_PIN, NEO_GRB + NEO_KHZ800);
const unsigned long LESSON = 45UL * 1000;     // for a real lesson: 45UL * 60 * 1000
unsigned long start = 0;

void setup() {
  ring.begin();
  ring.setBrightness(40);
  start = millis();
}

void loop() {
  if (millis() - start >= LESSON) {
    for (int i = 0; i < 5; i++) {
      ring.fill(ring.Color(255, 180, 0));
      ring.show();
      delay(300);
      ring.clear();
      ring.show();
      delay(300);
    }
    start = millis();                    // a new lesson starts
  }
}
Solution 2: airing because of humidity
// Task – airing because of humidity too: the window opens when it is warm
// OR when the humidity is above 70 %
// (replace the "if (t > WARM)" part of the step 2 program with this function)
const float WARM = 26.0;
const float HUMID = 70.0;

bool shouldOpen(float t, float h) {
  return t > WARM || h > HUMID;
}

void setup() {
  Serial.begin(115200);
  // test the function on a few examples
  Serial.println(shouldOpen(24, 50));   // 0 – comfortable
  Serial.println(shouldOpen(28, 50));   // 1 – warm
  Serial.println(shouldOpen(22, 80));   // 1 – humid
}

void loop() {
}
Solution 3: opening the window gradually
// Task – the window opens gradually: the warmer it is, the wider it opens
// (26 °C = 0°, 30 °C or more = 90°)
#include <ESP32Servo.h>

Servo windowServo;

int angleForTemperature(float t) {
  // multiply by 10 to keep one decimal (map works with whole numbers)
  int angle = map((int)(t * 10), 260, 300, 0, 90);
  return constrain(angle, 0, 90);
}

void setup() {
  Serial.begin(115200);
  windowServo.setPeriodHertz(50);
  windowServo.attach(13, 500, 2400);
  for (float t = 24; t <= 32; t += 1) {             // test at a few temperatures
    Serial.print(t);
    Serial.print(" C -> ");
    Serial.println(angleForTemperature(t));
  }
}

void loop() {
}
What next
You have finished the course! Check what you know on the page Final test: Arduino and ESP32, then continue with Internet of Things (IoT), where the ESP32 sends data to the internet.
Check your knowledge
Open the quiz
Quiz: smart classroom
1. Why is the LED ring moved to GPIO27 in the project?
2. What should you do if the ESP32 resets when the servo starts?
3. What does server.arg("w") return when the address /window?w=open is opened?
4. Why does the final program measure with millis() and not delay(2000)?